
The Photo Rally minigame has returned in Like a Dragon: Pirate Yakuza in Hawaii, with it unlocking automatically in Chapter 2 of the main story. It plays out the same way as it did in Infinite Wealth, as you need to go to specific locations to photograph certain landmarks/objects. You’ll know you’re in the correct spot, as the item in question will have a camera symbol above it. You can use the camera by pressing up on the directional pad, then get the object in frame and snap the picture when the camera icon turns green.
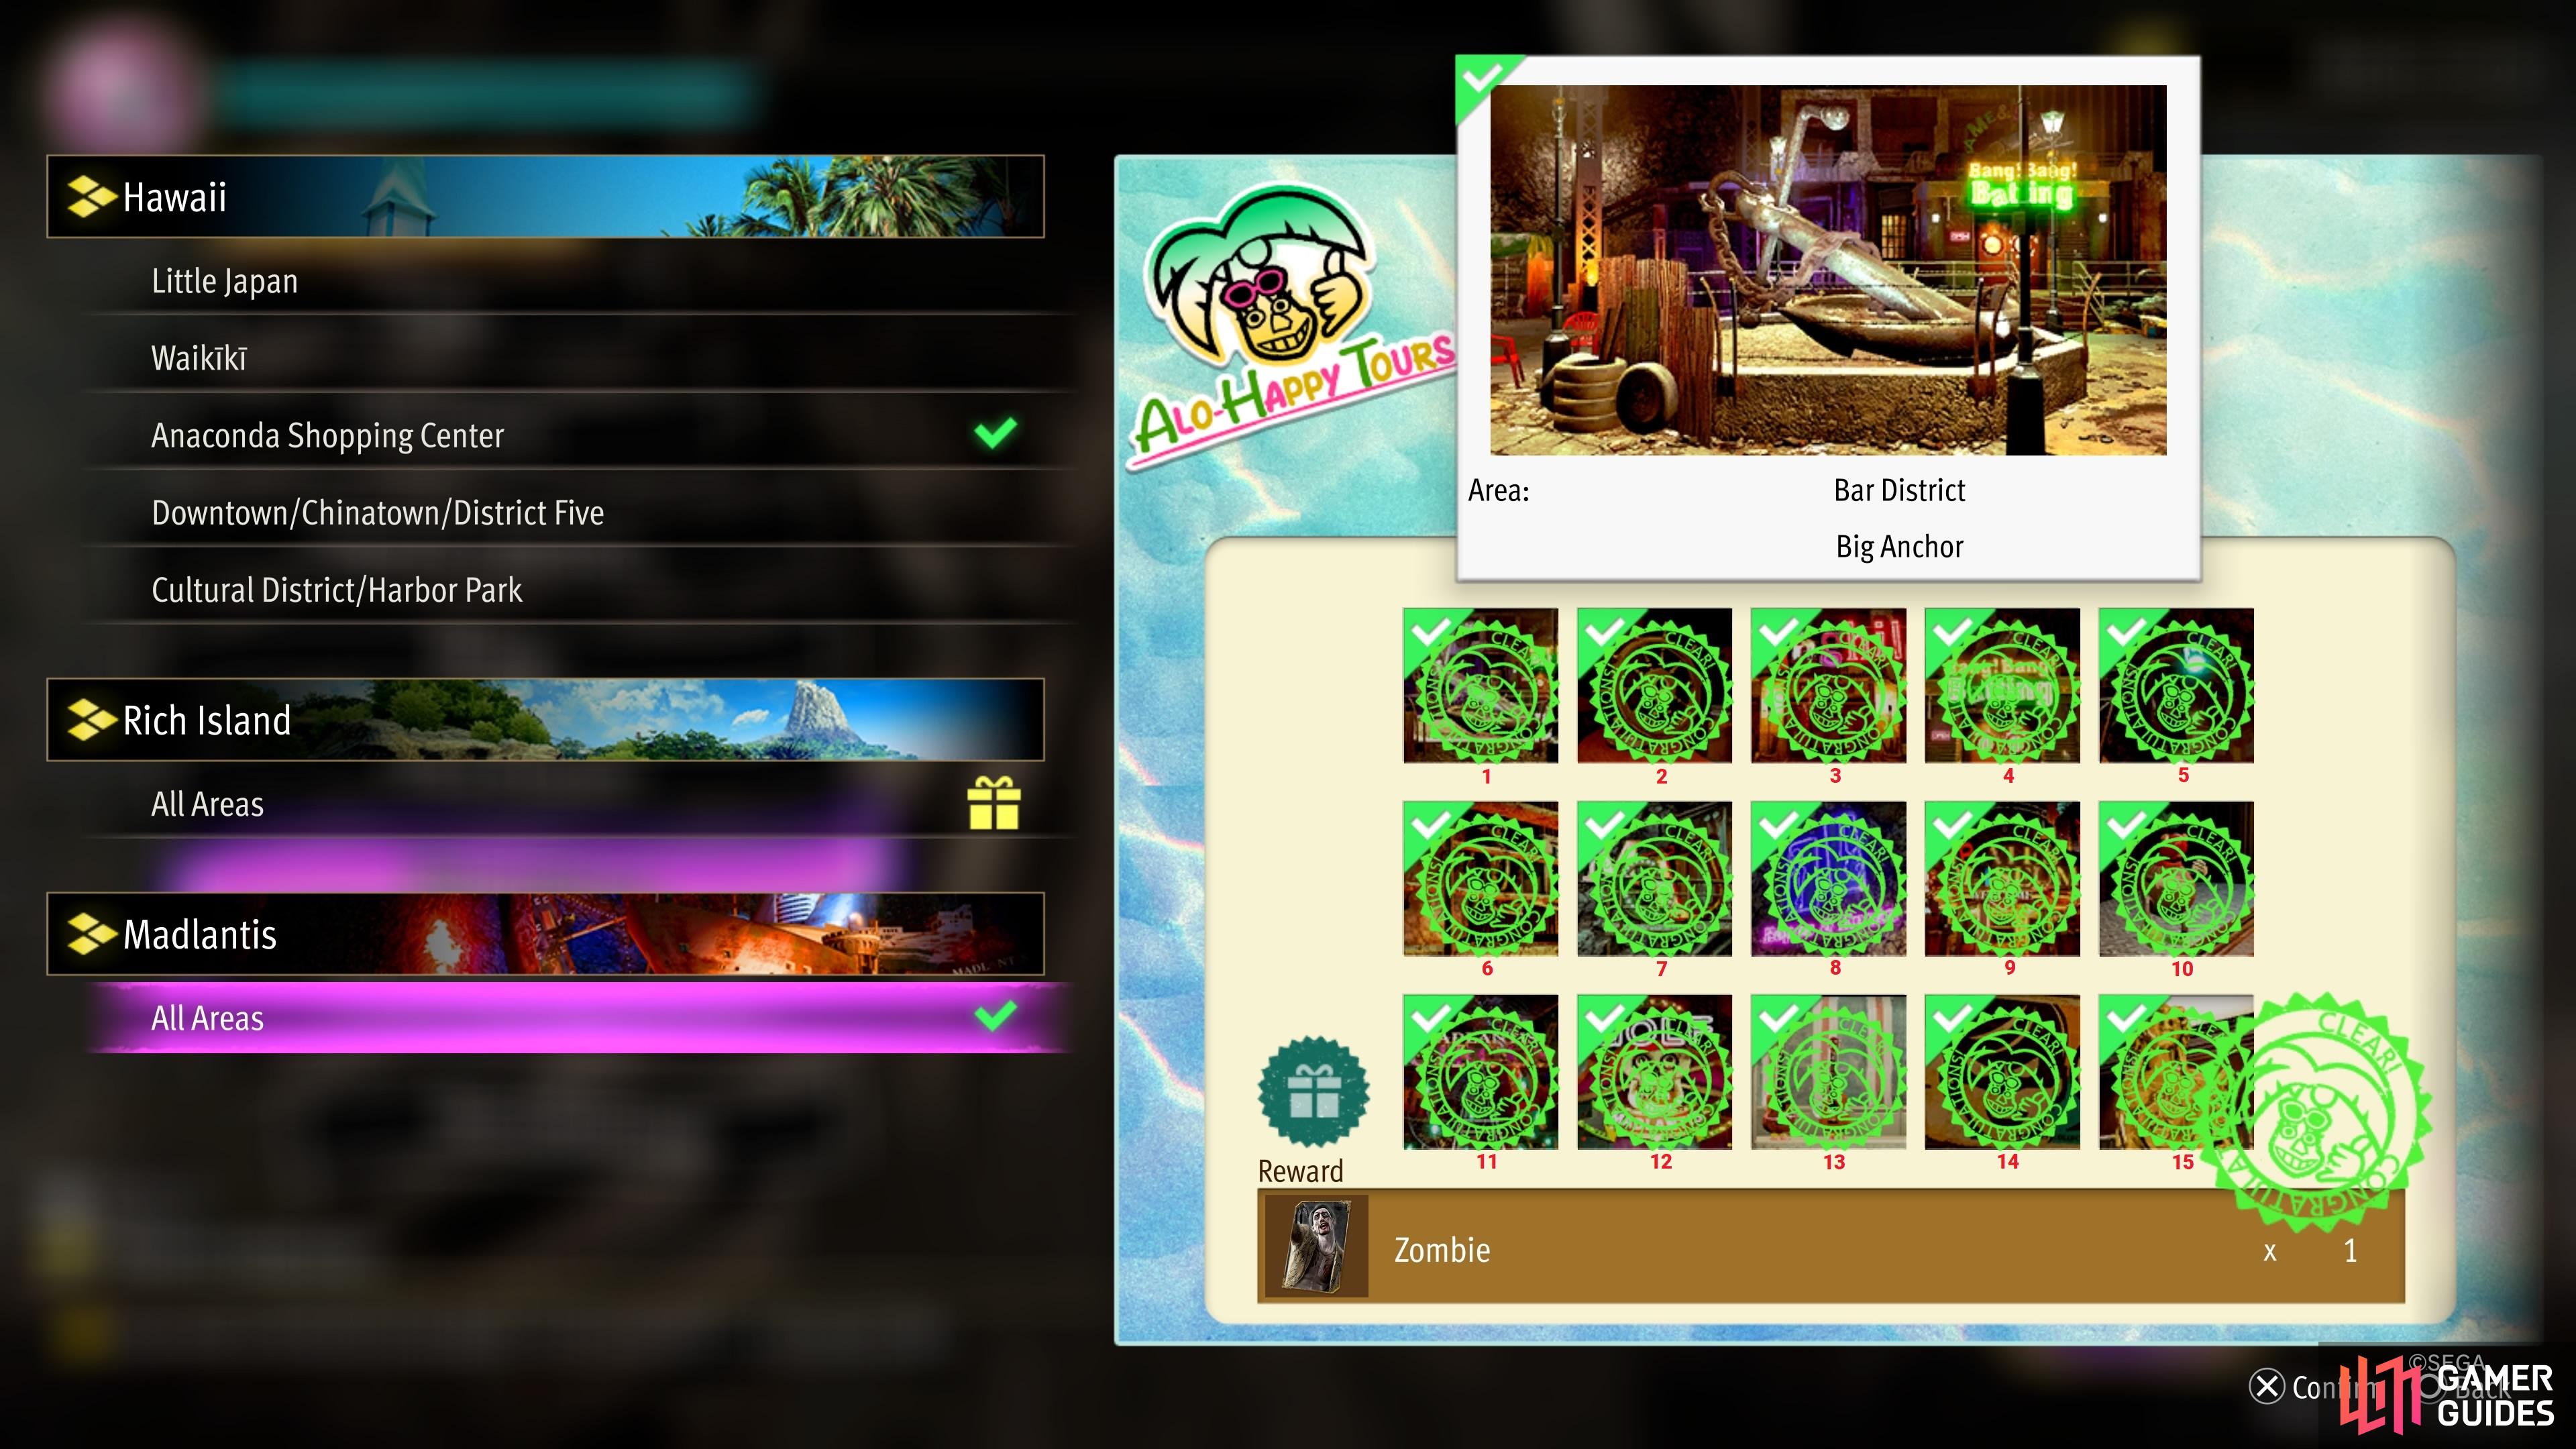
There are a total of 15 photos to take in Madlantis for the Photo Rally.
All Madlantis Photo Rally Locations
Madlantis is the only area where you won’t be able to actually get all of the photos right away. That’s because the game story locks about half of the zone, plus there’s one picture that requires you to do a tiny bit of the Pirates’ Coliseum first. Outside of that, the area is pretty small, so it won’t take too long to get everything done. There are a total of 15 Photos to take in Madlantis. Your reward for completing this set of photos is the Zombie Customization Set for Majima.
Madlantis Photo Rally Location #1
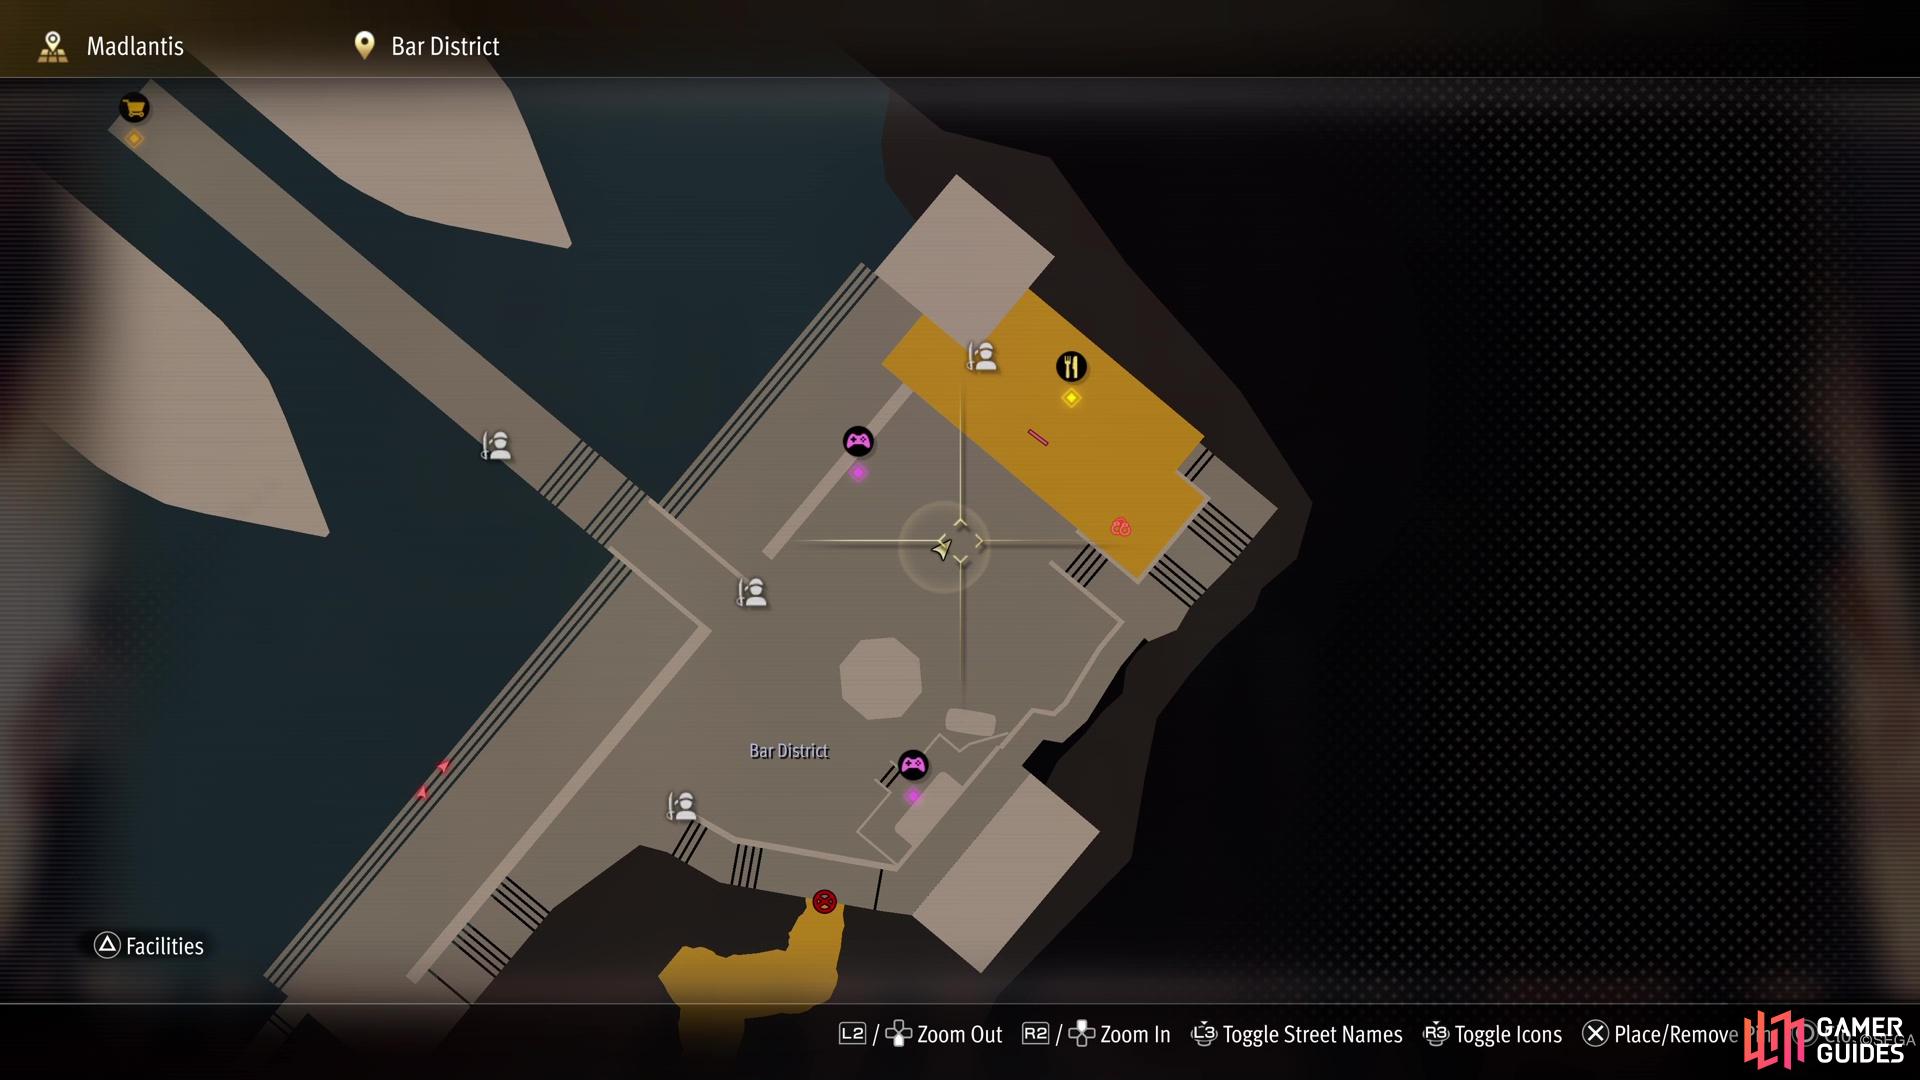
For the first photo, head to the Bar District, which is the area with the Bang Bang Batting Center. In the middle of the outside section, you should see a large central structure, that is a large anchor. You will be taking a picture of this anchor, but try to do it on the western side, just to be sure.
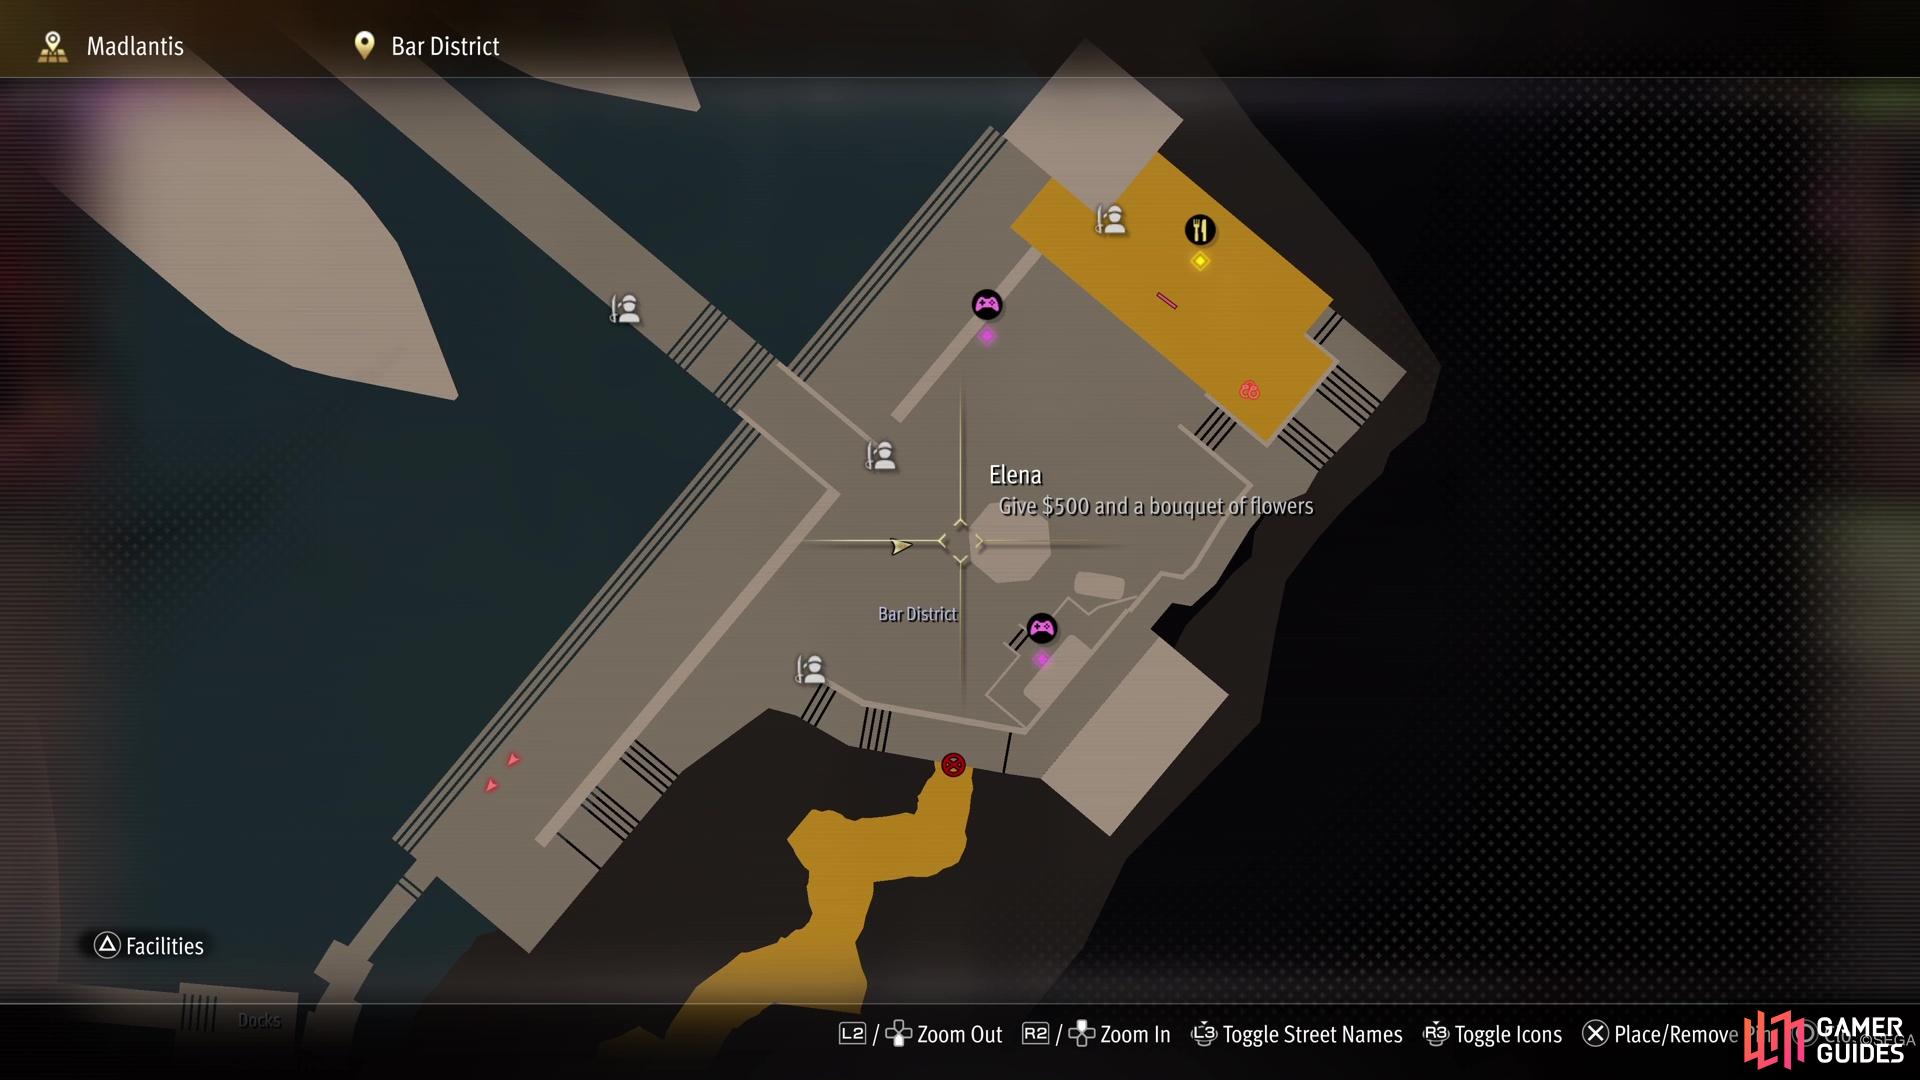
The Bar District is your stop for the first entry on the list.
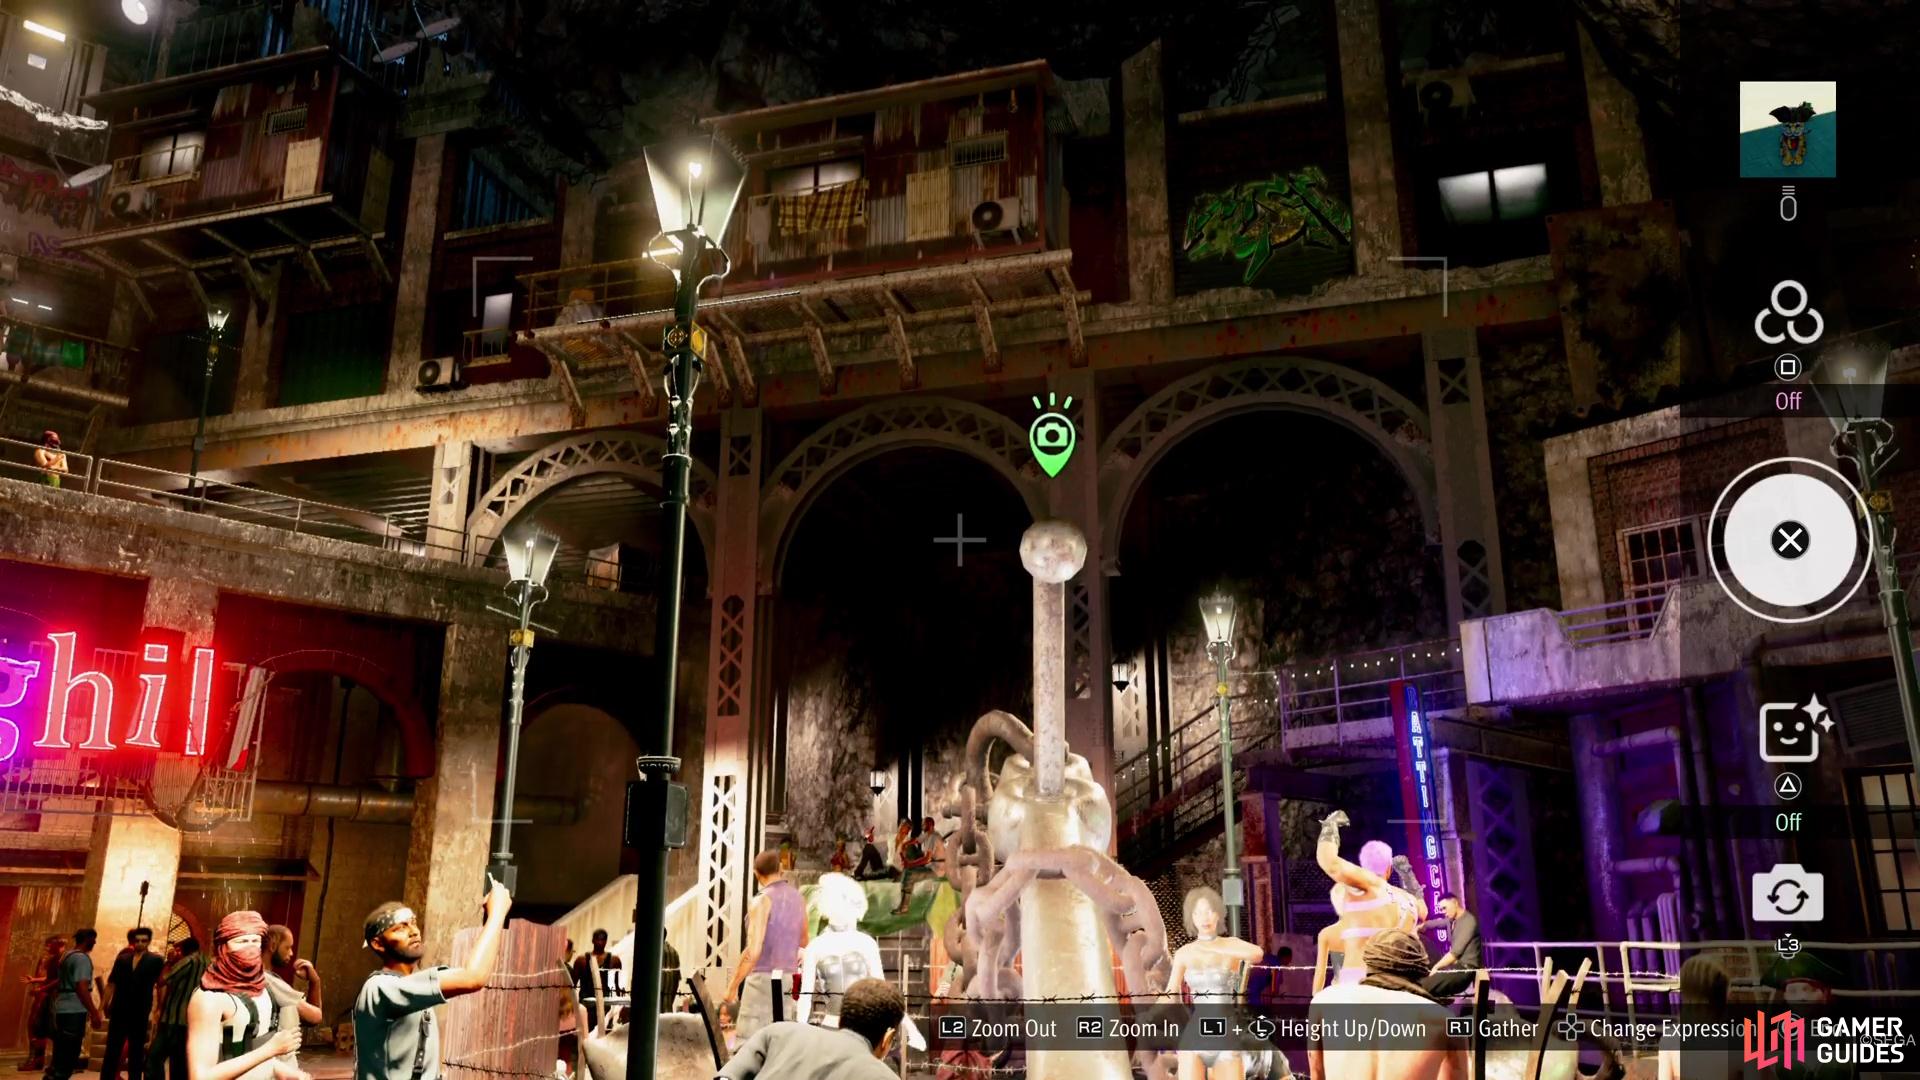
The anchor statue in the middle of the square is what you need.
Madlantis Photo Rally Location #2
While in the same area as the previous one, head inside the Dunghill bar and approach the counter. There is a steering wheel on the counter, on the left side, so take a picture of it for this entry.
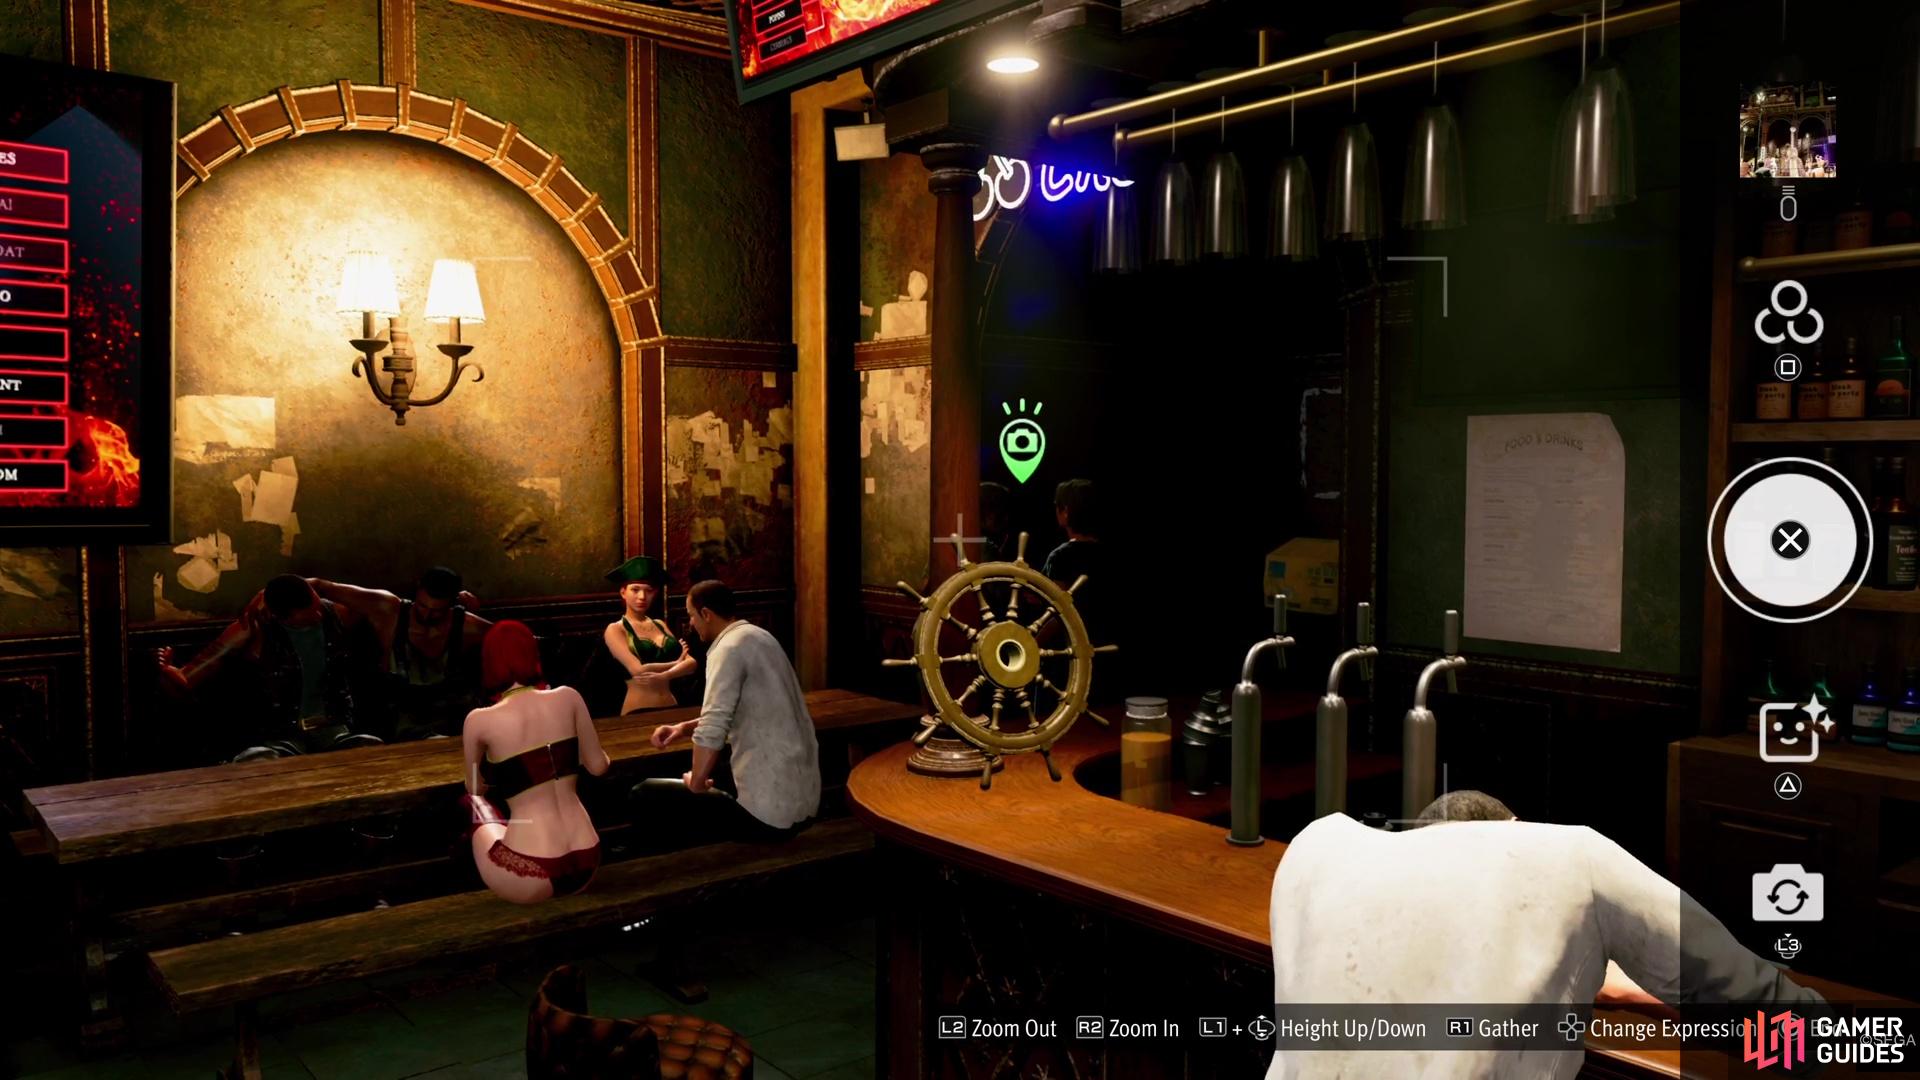
Go into Dunghill Bar and find the steering wheel on the counter.
Madlantis Photo Rally Location #3
For the third entry, you will need to snap a picture of the sign for the Dunghill bar. So, after getting the one inside the bar, step outside and turn around, then look up at the sign to see the camera icon. Whip out your camera and get the icon to turn green, then get the picture of the sign.
Head to the outside of the Dunghill Bar for the third entry.
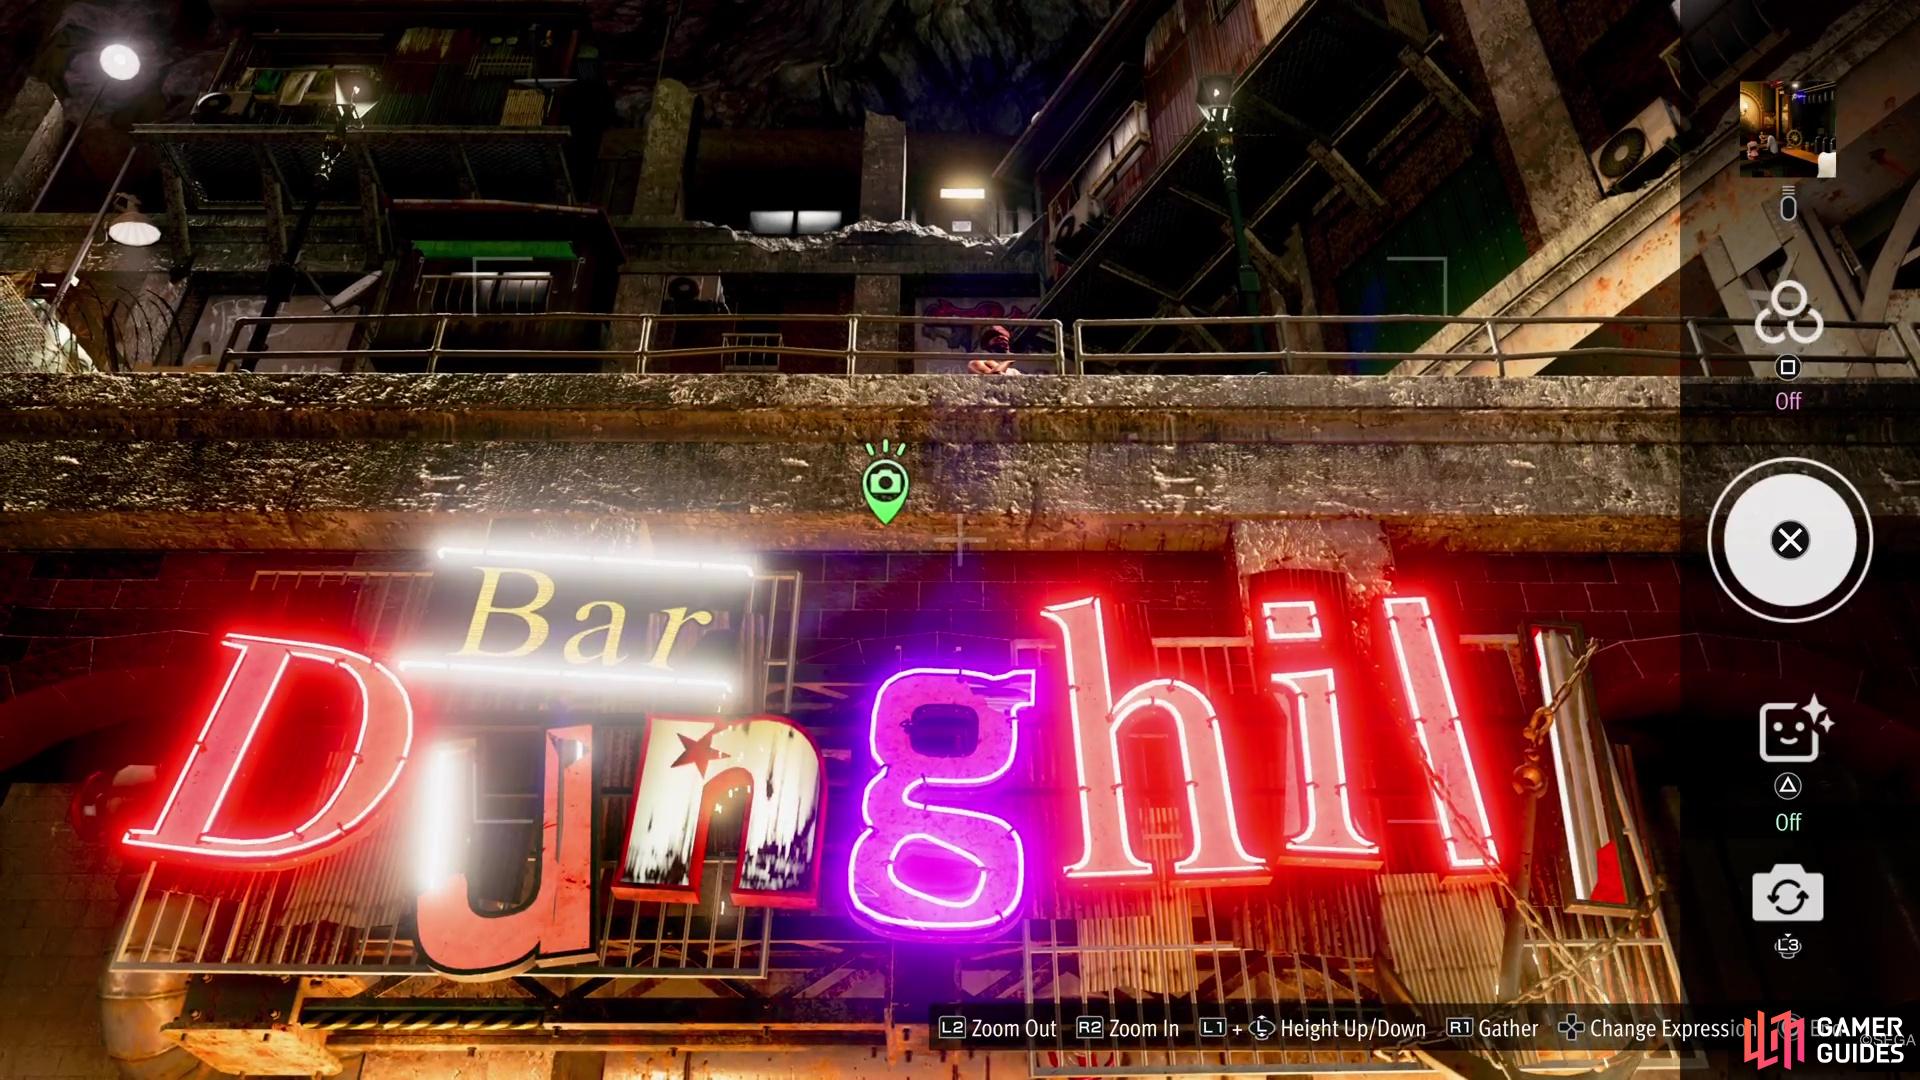
You’ll need to take a picture of the Dungbill Bar sign above its entrance.
Madlantis Photo Rally Location #4
In the same area as the Dunghill bar, there is a minigame called Bang Bang Batting Center. While still in the square, head on over to the minigame location and look up at the colorful sign over the NPC for it. Take out the camera and snap a picture of the sign for this entry. If you are having trouble getting the icon to turn green, try to align yourself so you’re looking straight at the cannon, instead of off to the side.
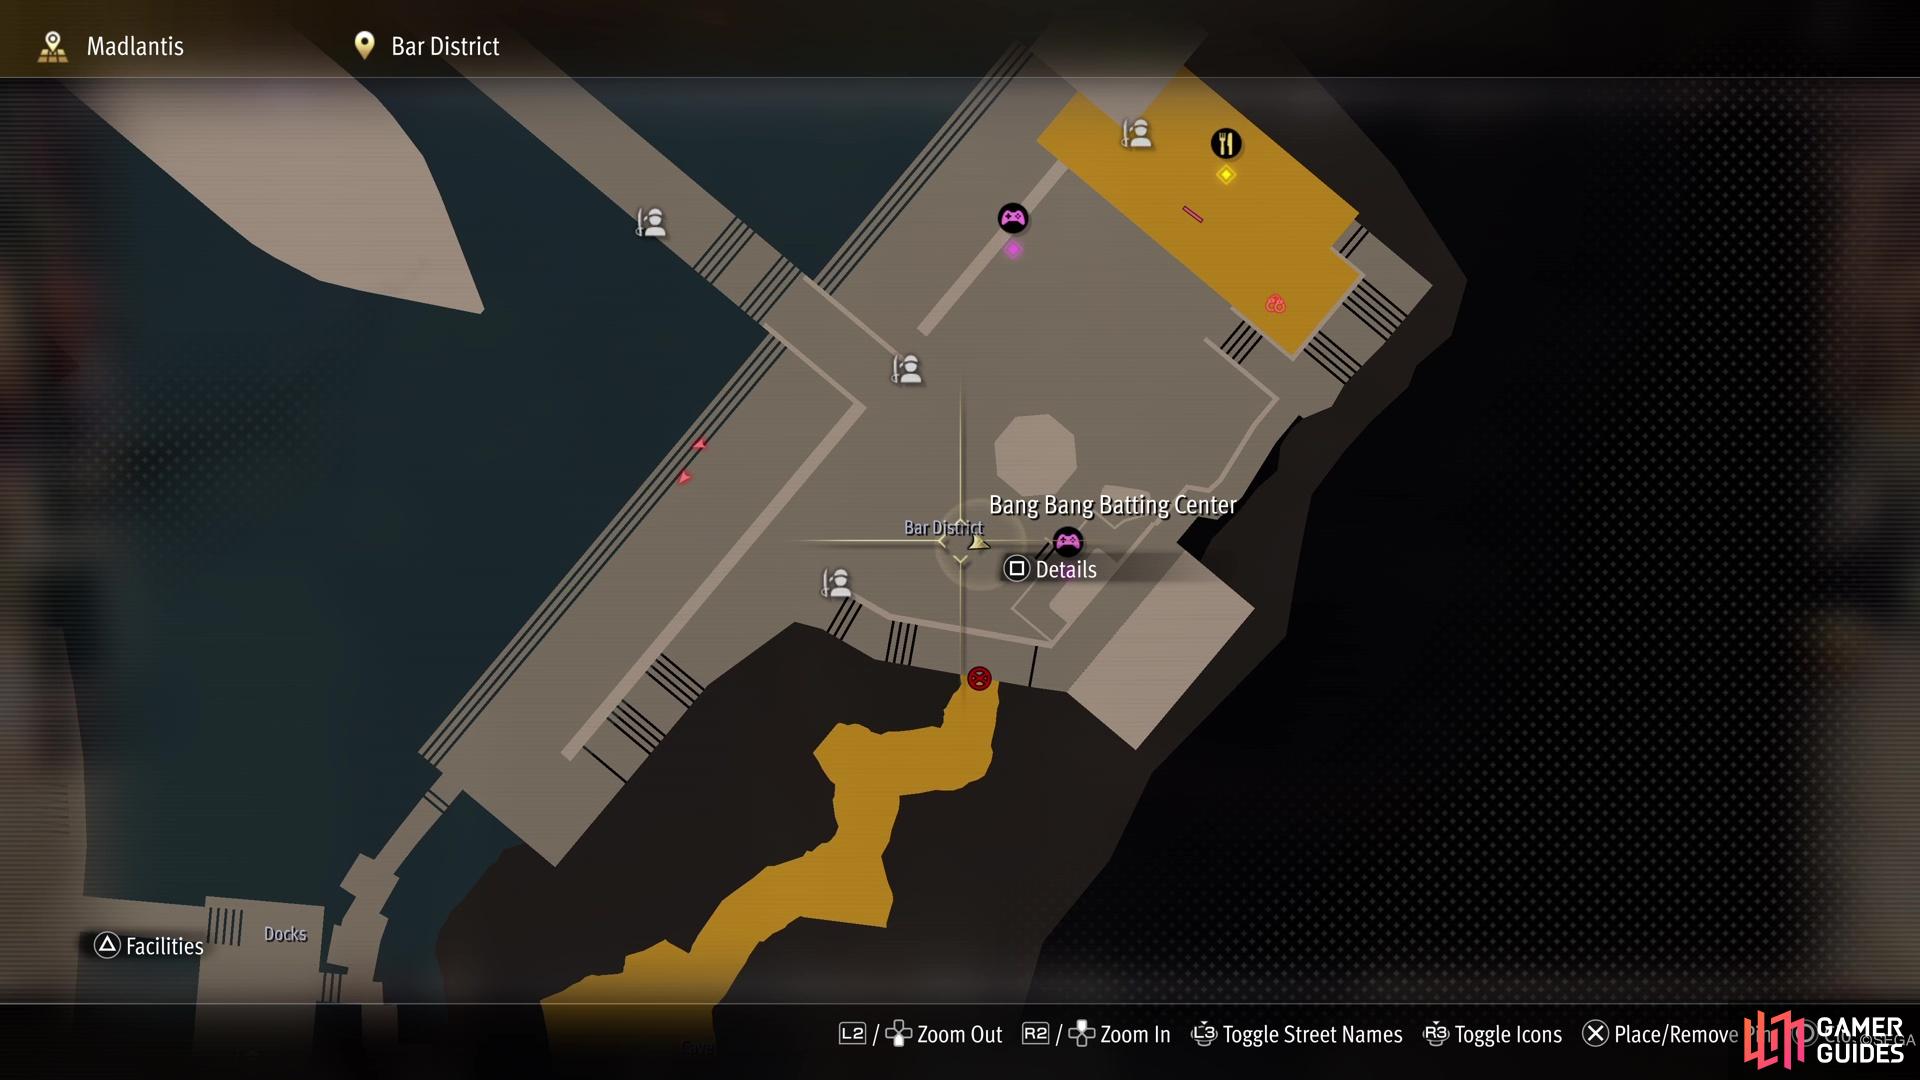
There is the Batting Center minigame in the Bar District.
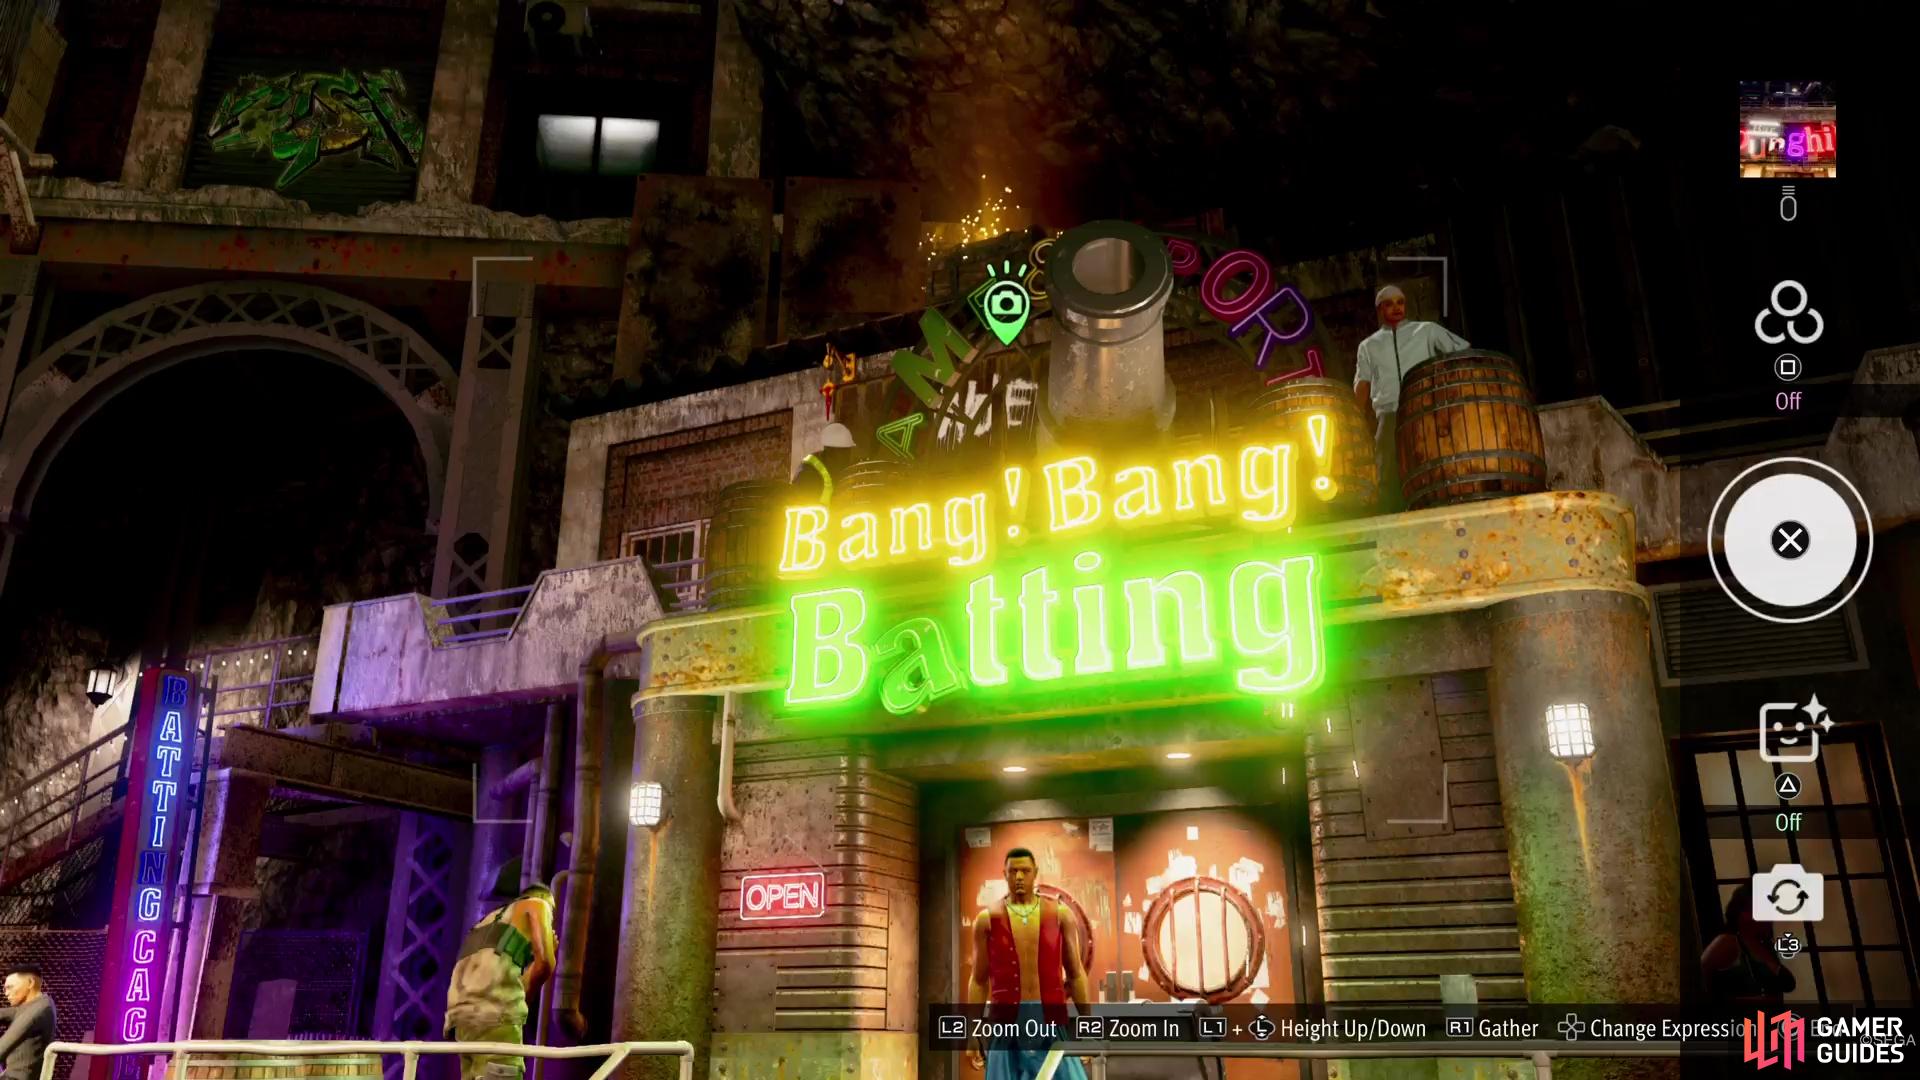
Snap a photo of the Batting Center’s sign for this entry.
Madlantis Photo Rally Location #5
This next entry is a little hard to pinpoint (as well as the next one), as it’s not a landmark that is obvious. As you’re walking from the Bar District to the Coliseum Grounds, you will have to go through a narrow walkway. While going this way, keep a look upwards and when you see a traffic light, stop. This traffic light will always be green, but that is what you need to take a picture of for this spot.
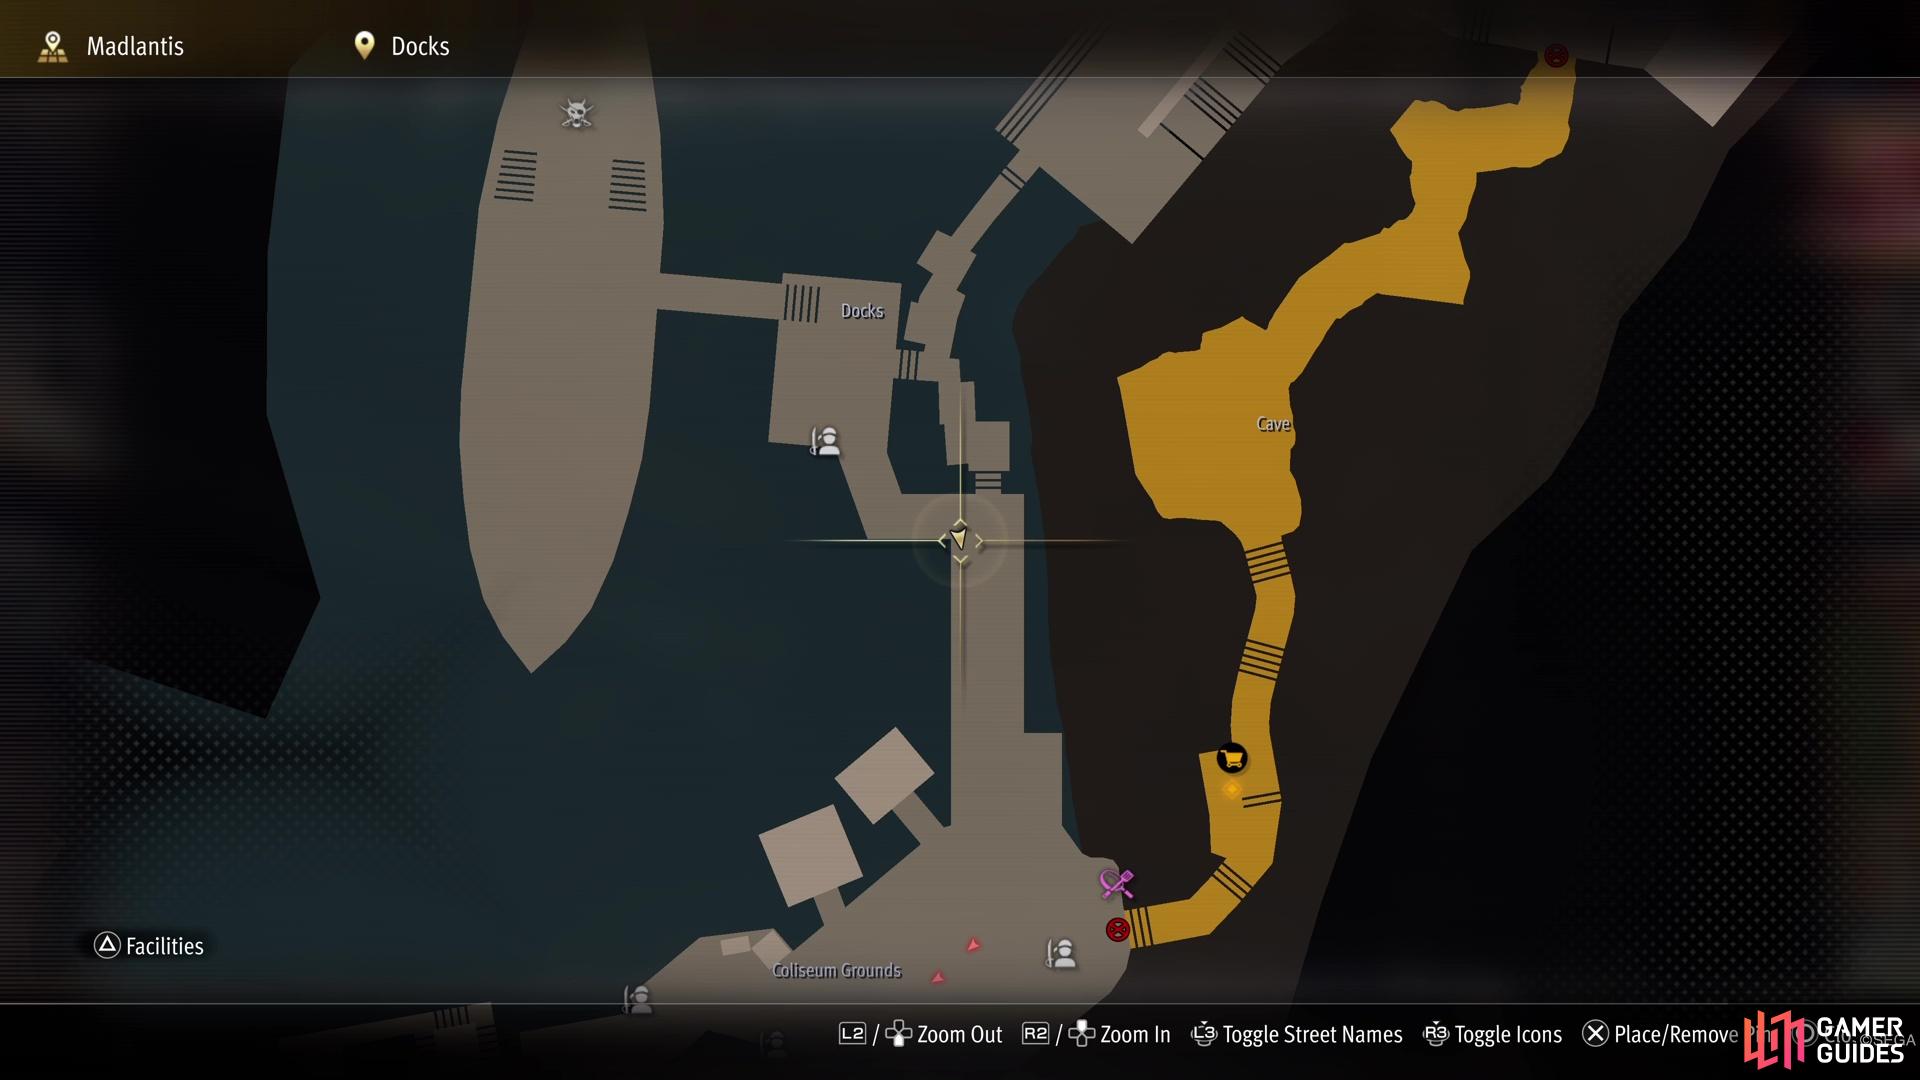
As you make your way to the Coliseum Grounds, stop at this spot.
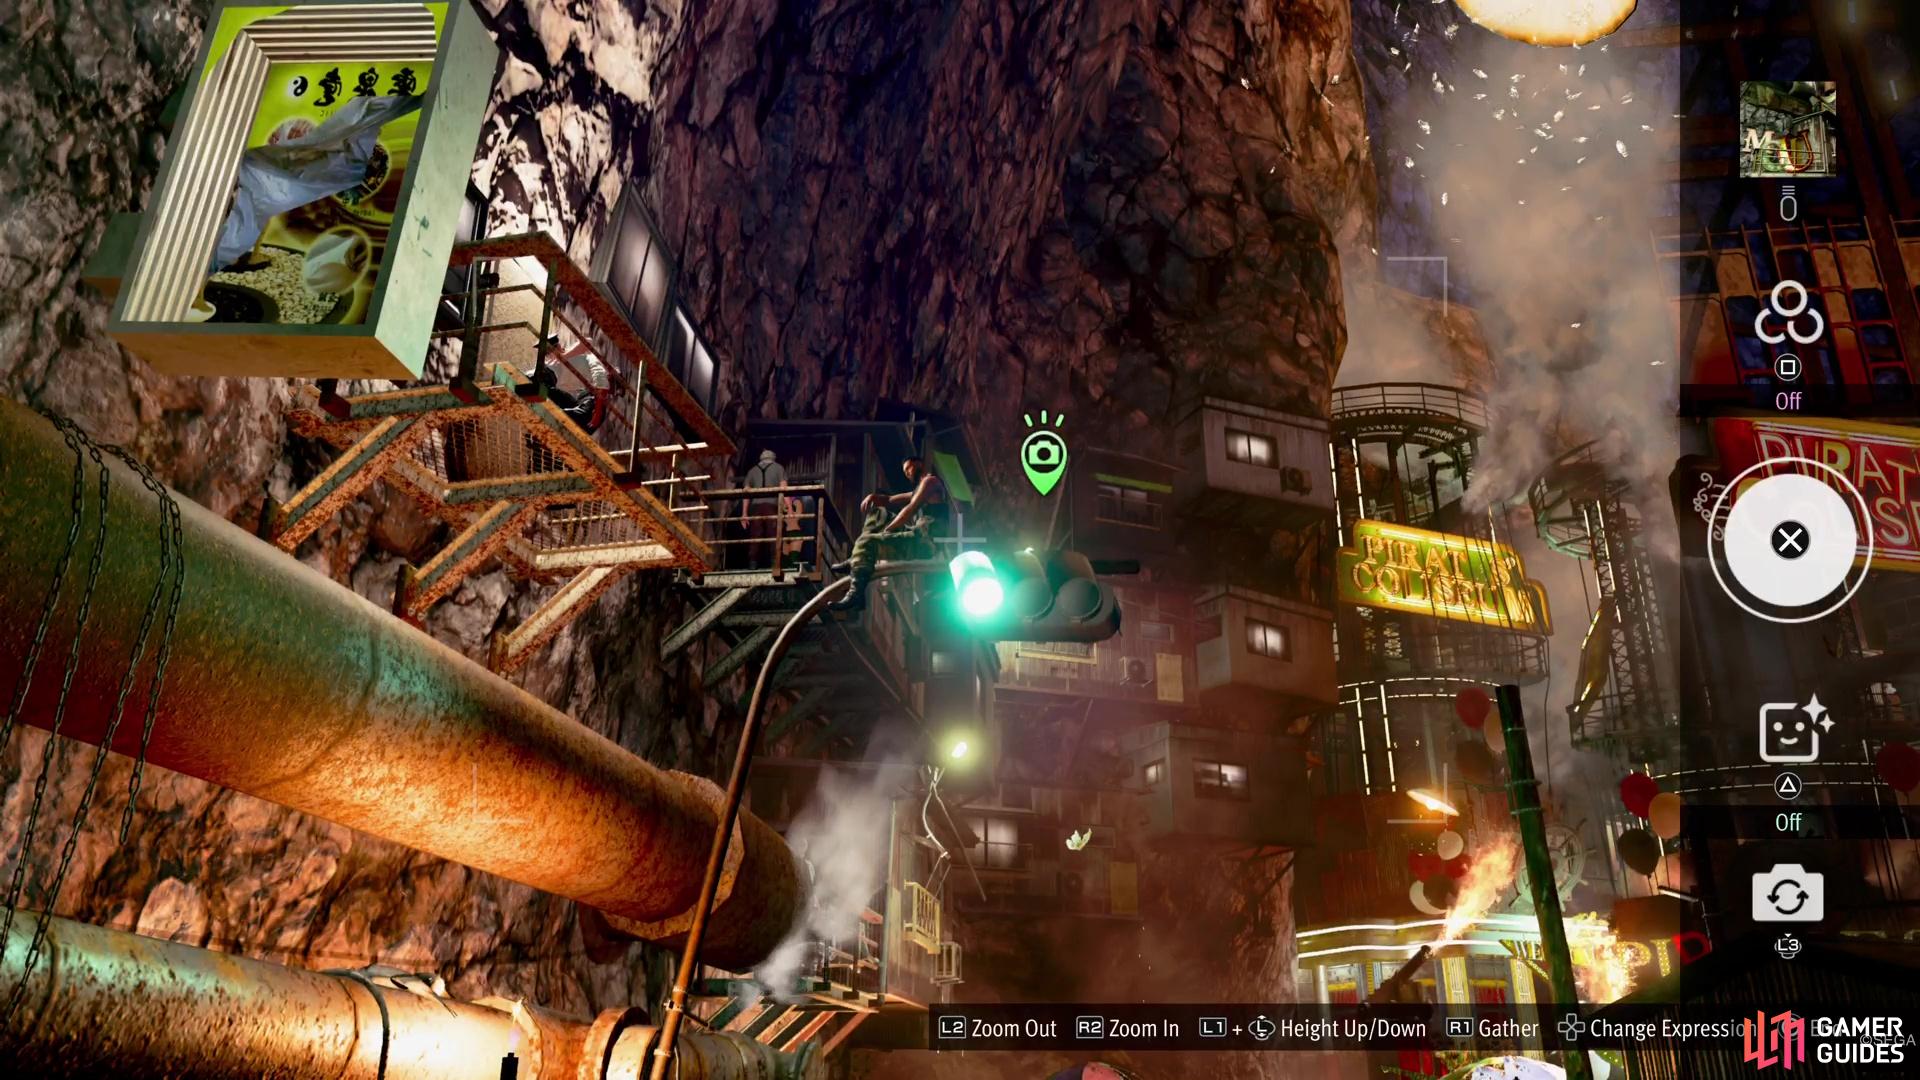
Look up to spot a traffic light and take a picture of it.
Madlantis Photo Rally Location #6
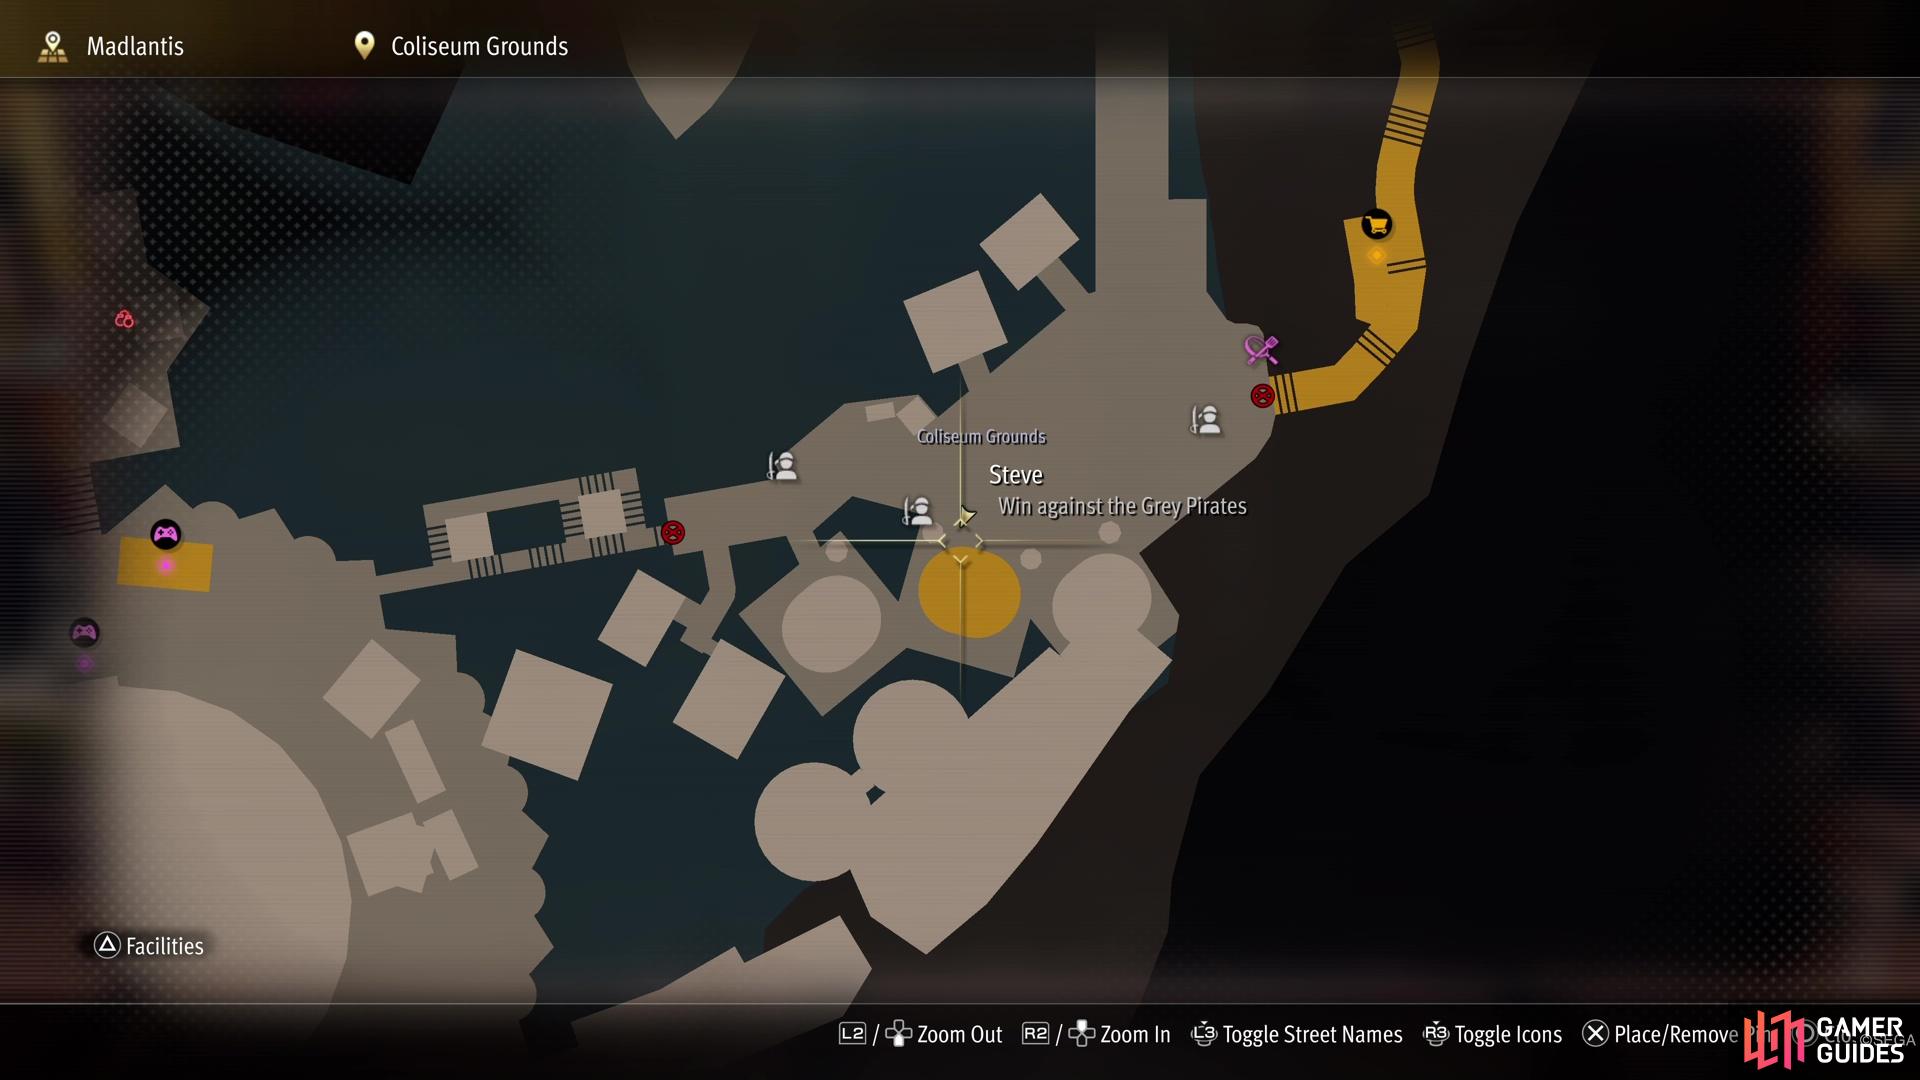
This entry is literally right past the traffic light from #5, right as you enter the Coliseum Grounds. As soon as you pass the traffic light, you should see a little balcony on the eastern side. There is some kind of statue or something on this balcony, which is what the picture you need to take is.
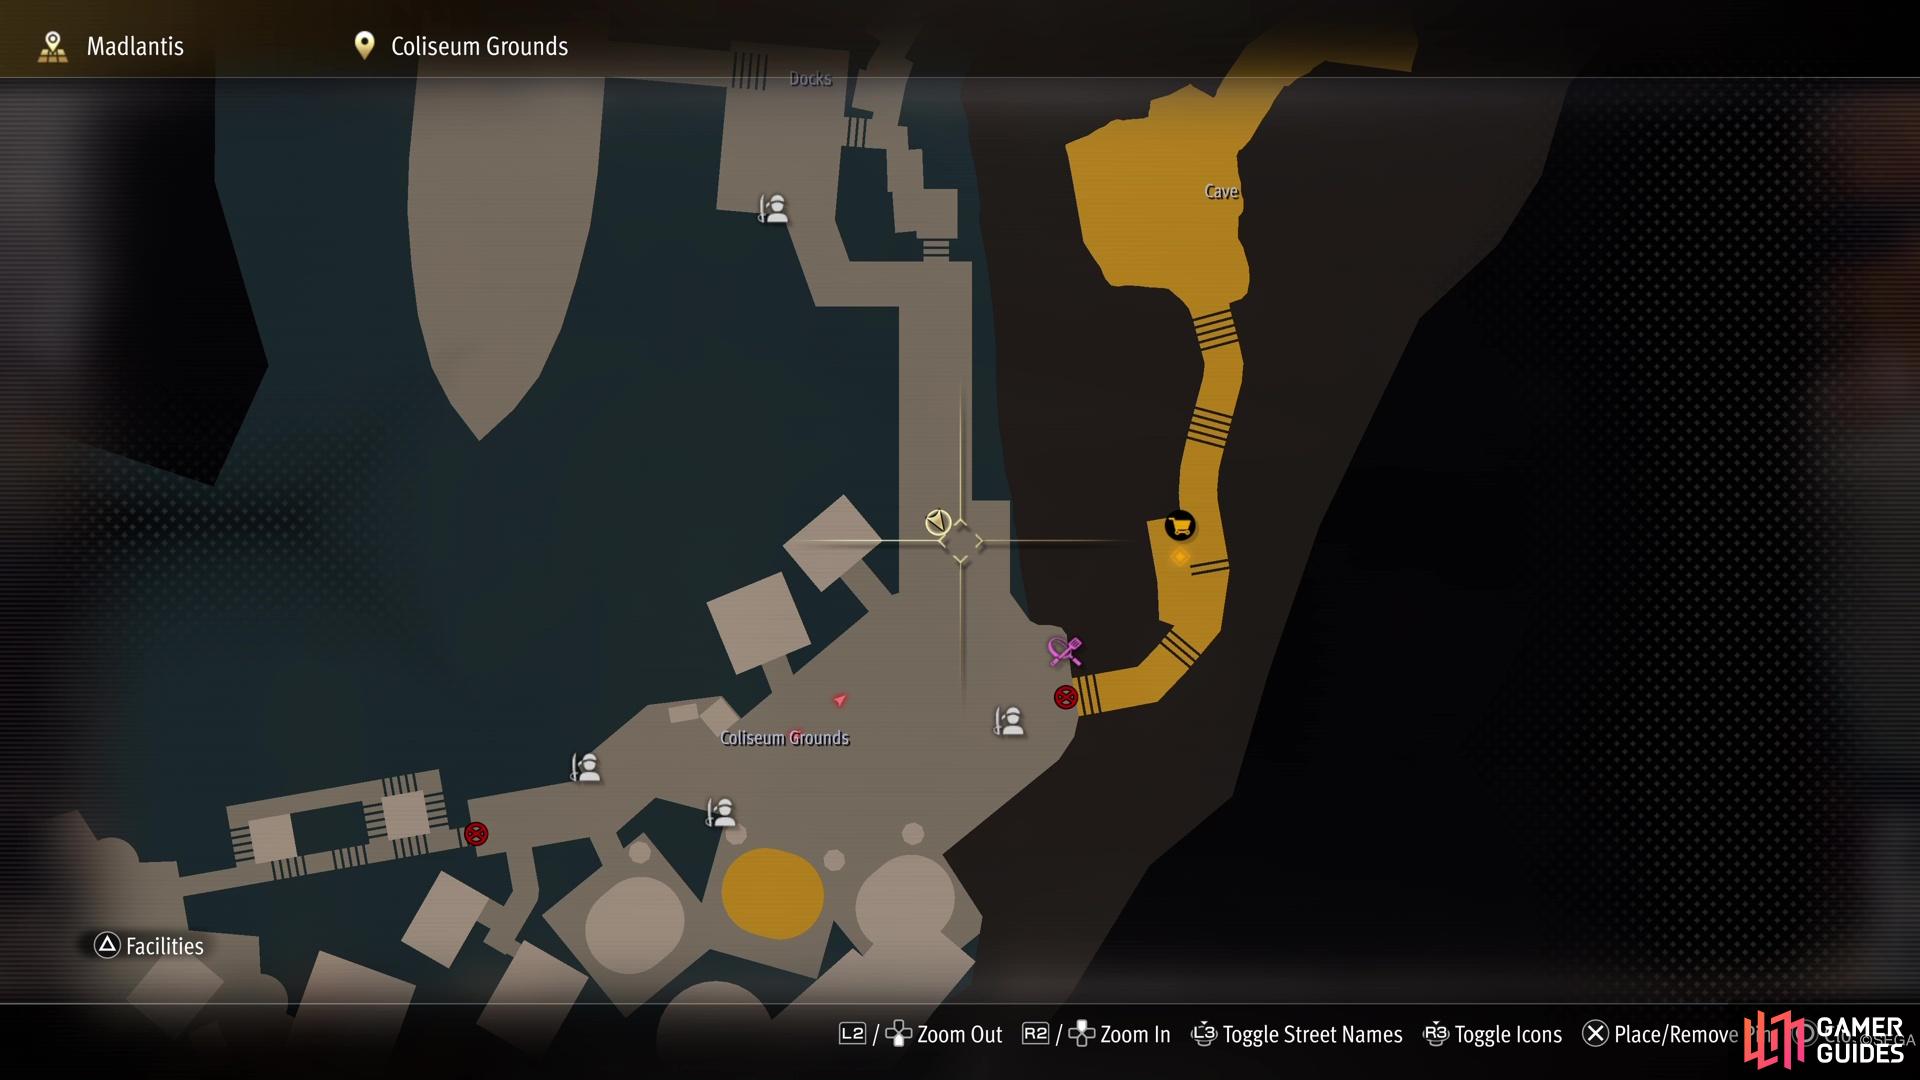
Just past the traffic light from #5, stop at this spot right before entering the Coliseum Grounds.
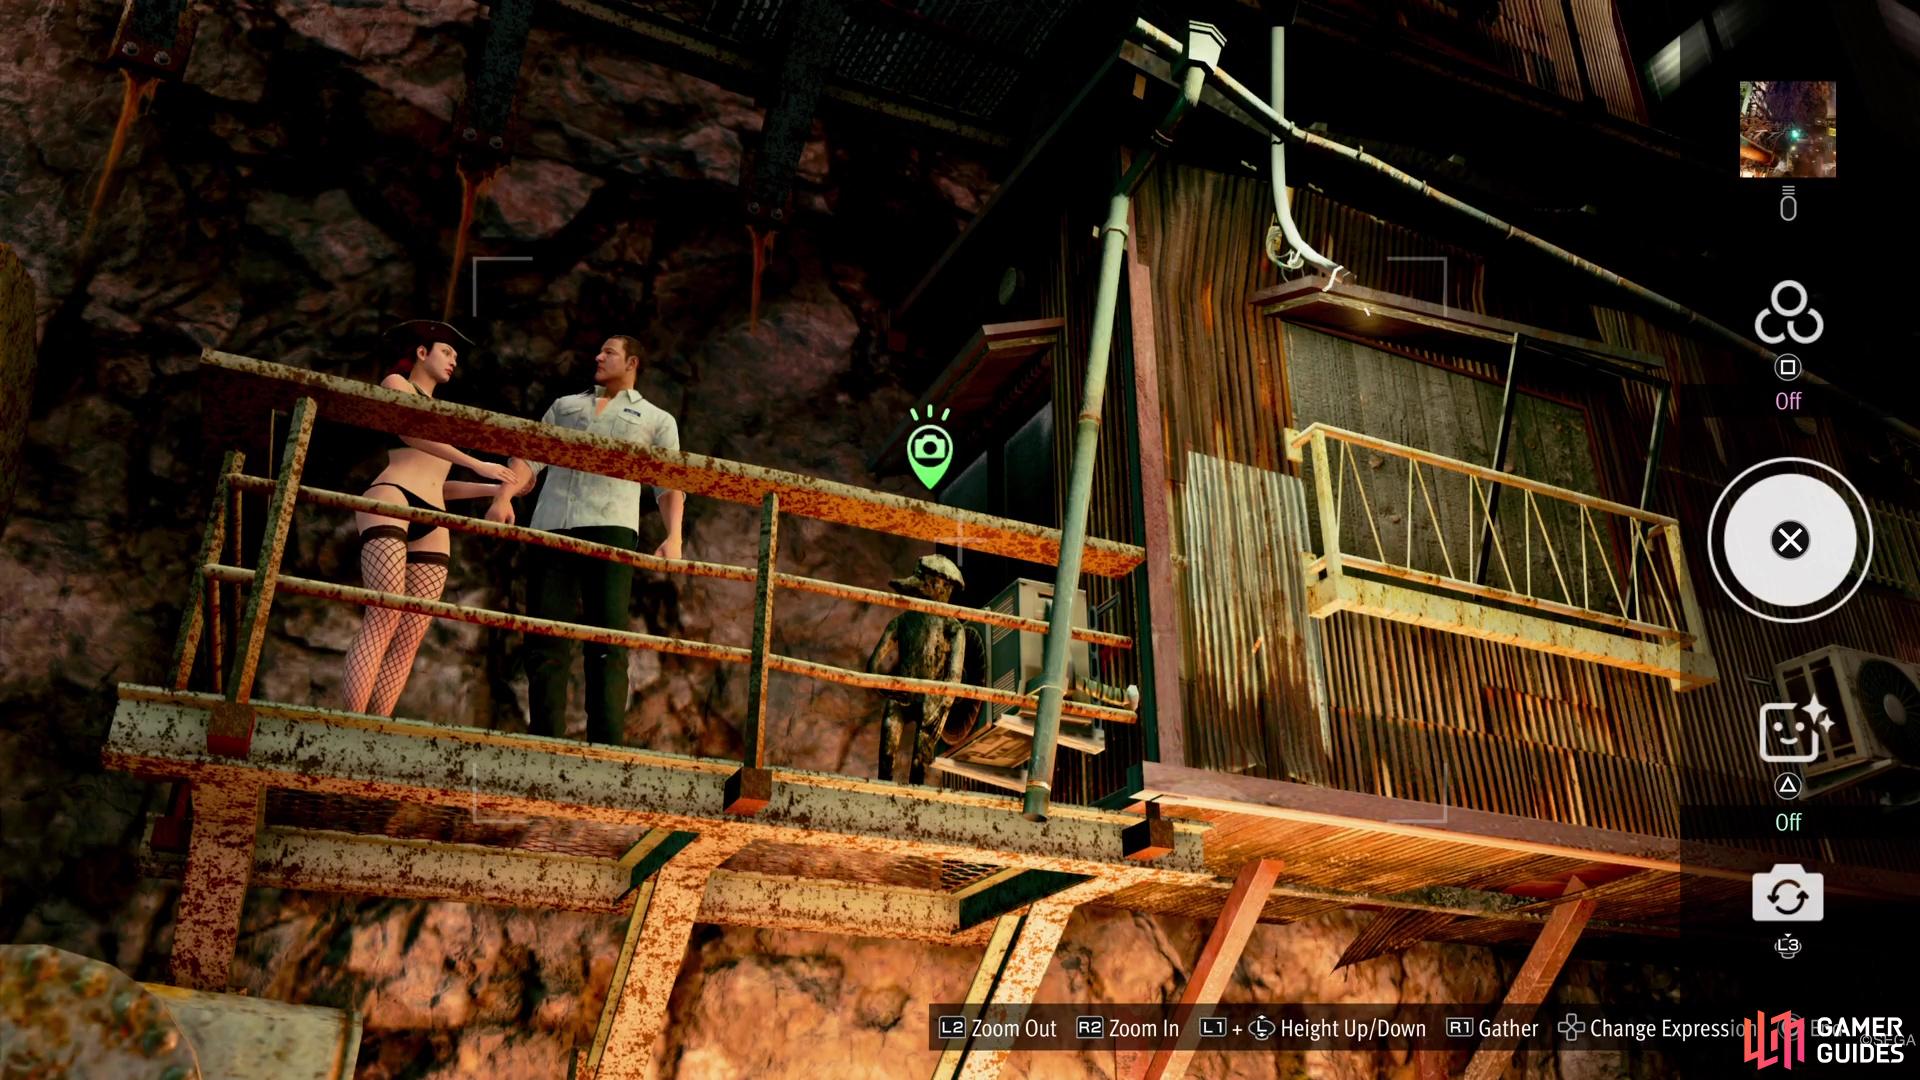
Look up at this balcony to spot some kind of statue to snap a picture of.
Madlantis Photo Rally Location #7
Start by going to the Bar District, the northernmost portion of Madlantis. As you venture south, you will eventually reach a narrow passage, which leads to the Coliseum Grounds, as well as your ship. Just as you get started on the narrow walkway, right next to where “Docks” is written on the map, you should see some letters on the eastern side. These letters are “MCU” and that’s what you need to take a picture of for this entry.
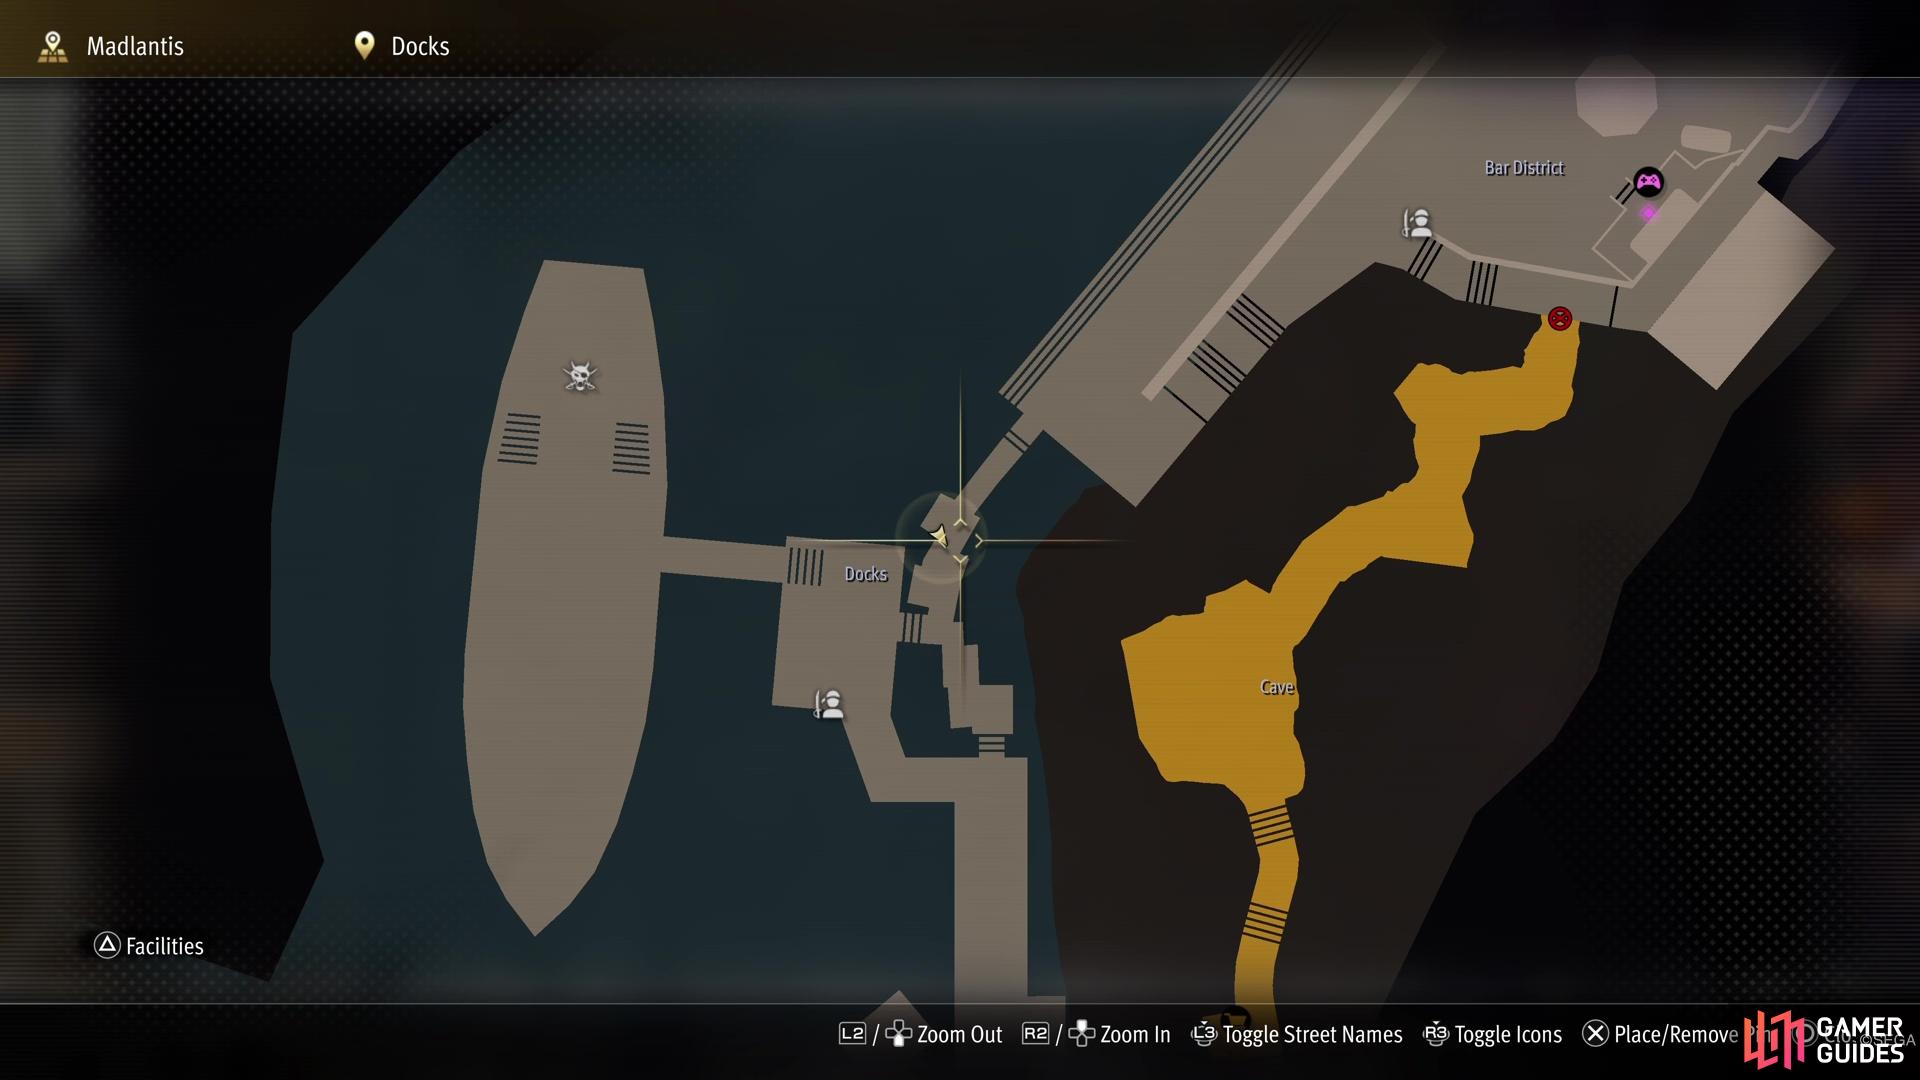
On the narrow path between the Bar District and the Coliseum Grounds, stop here.
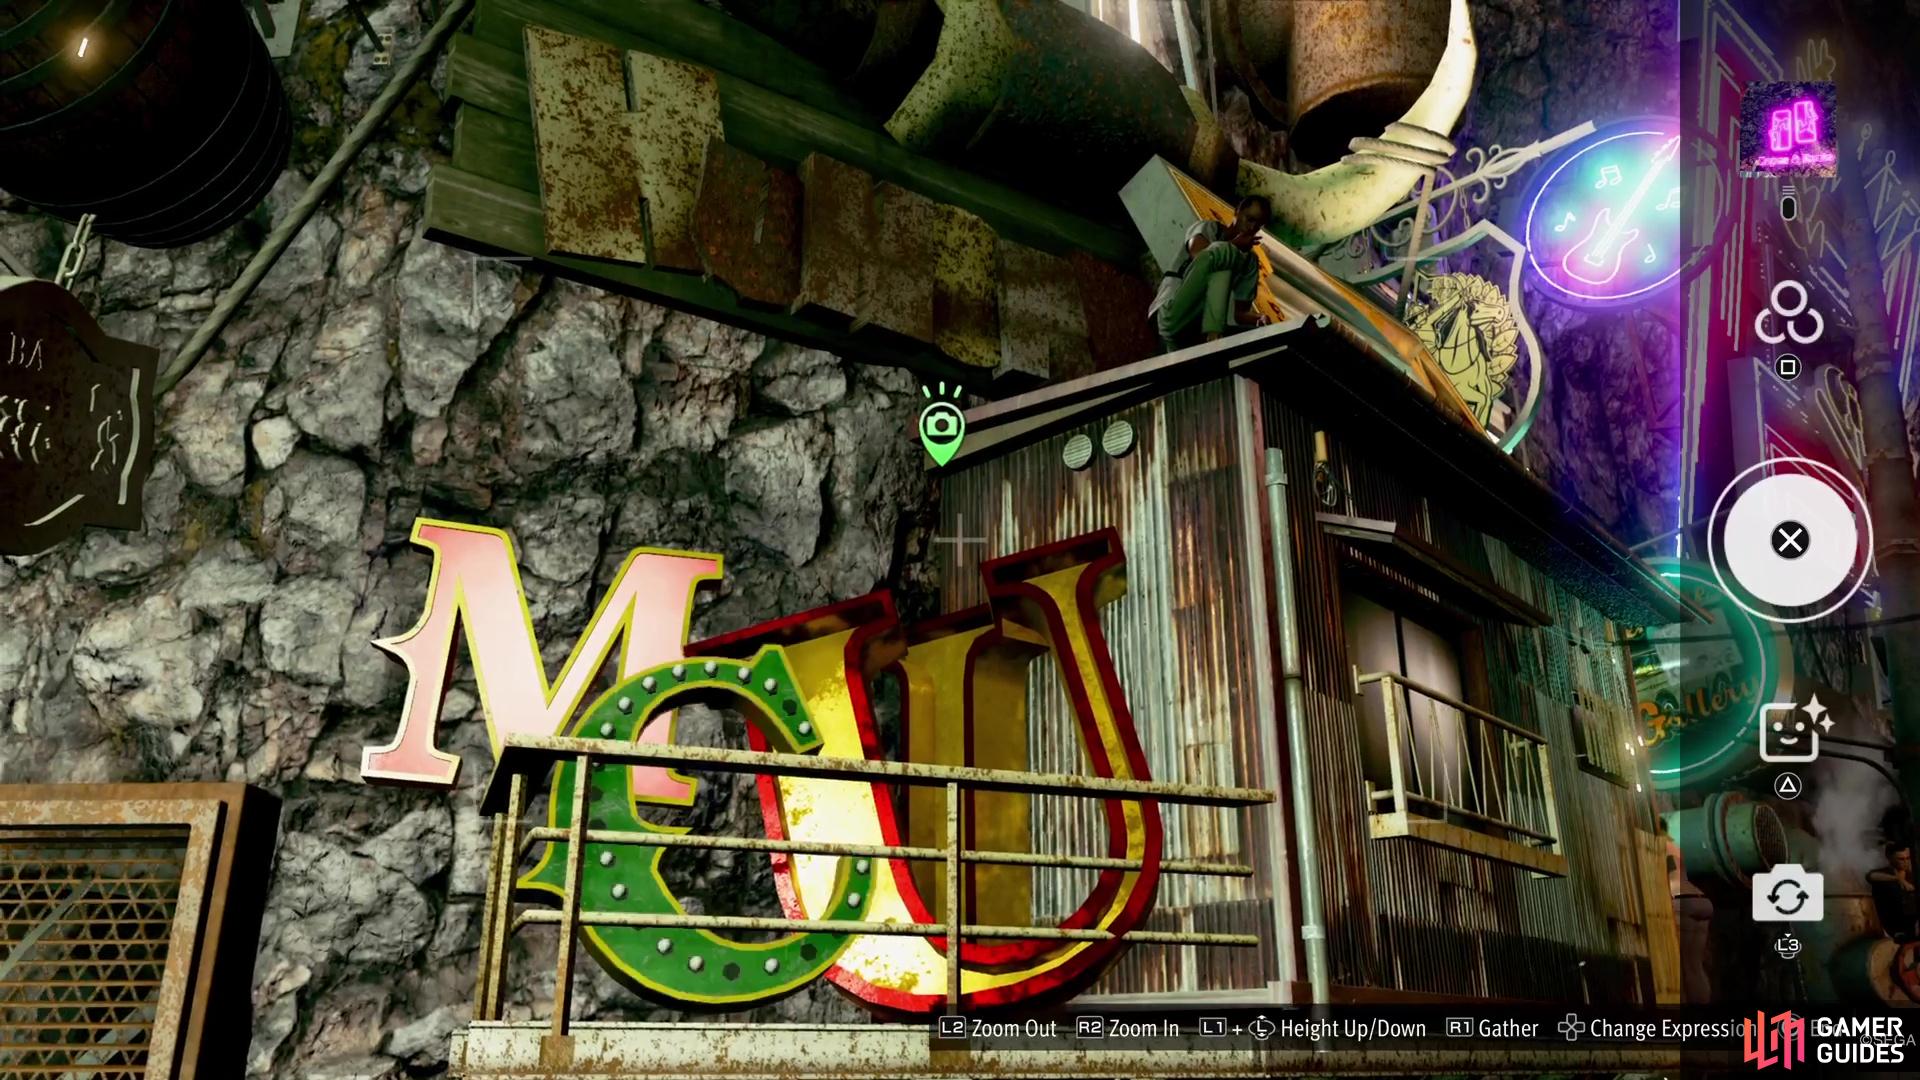
Take a gander at the eastern wall to see some letters, so snap a photo.
Madlantis Photo Rally Location #8
From the Bar District, head southwest and before you get to the small walkway that leads to the Docks area, turn southeast and look at the wall. You should see a large neon sign that says Ropes & Knots on the wall. That neon sign is what you’ll have to take a picture of for this entry.
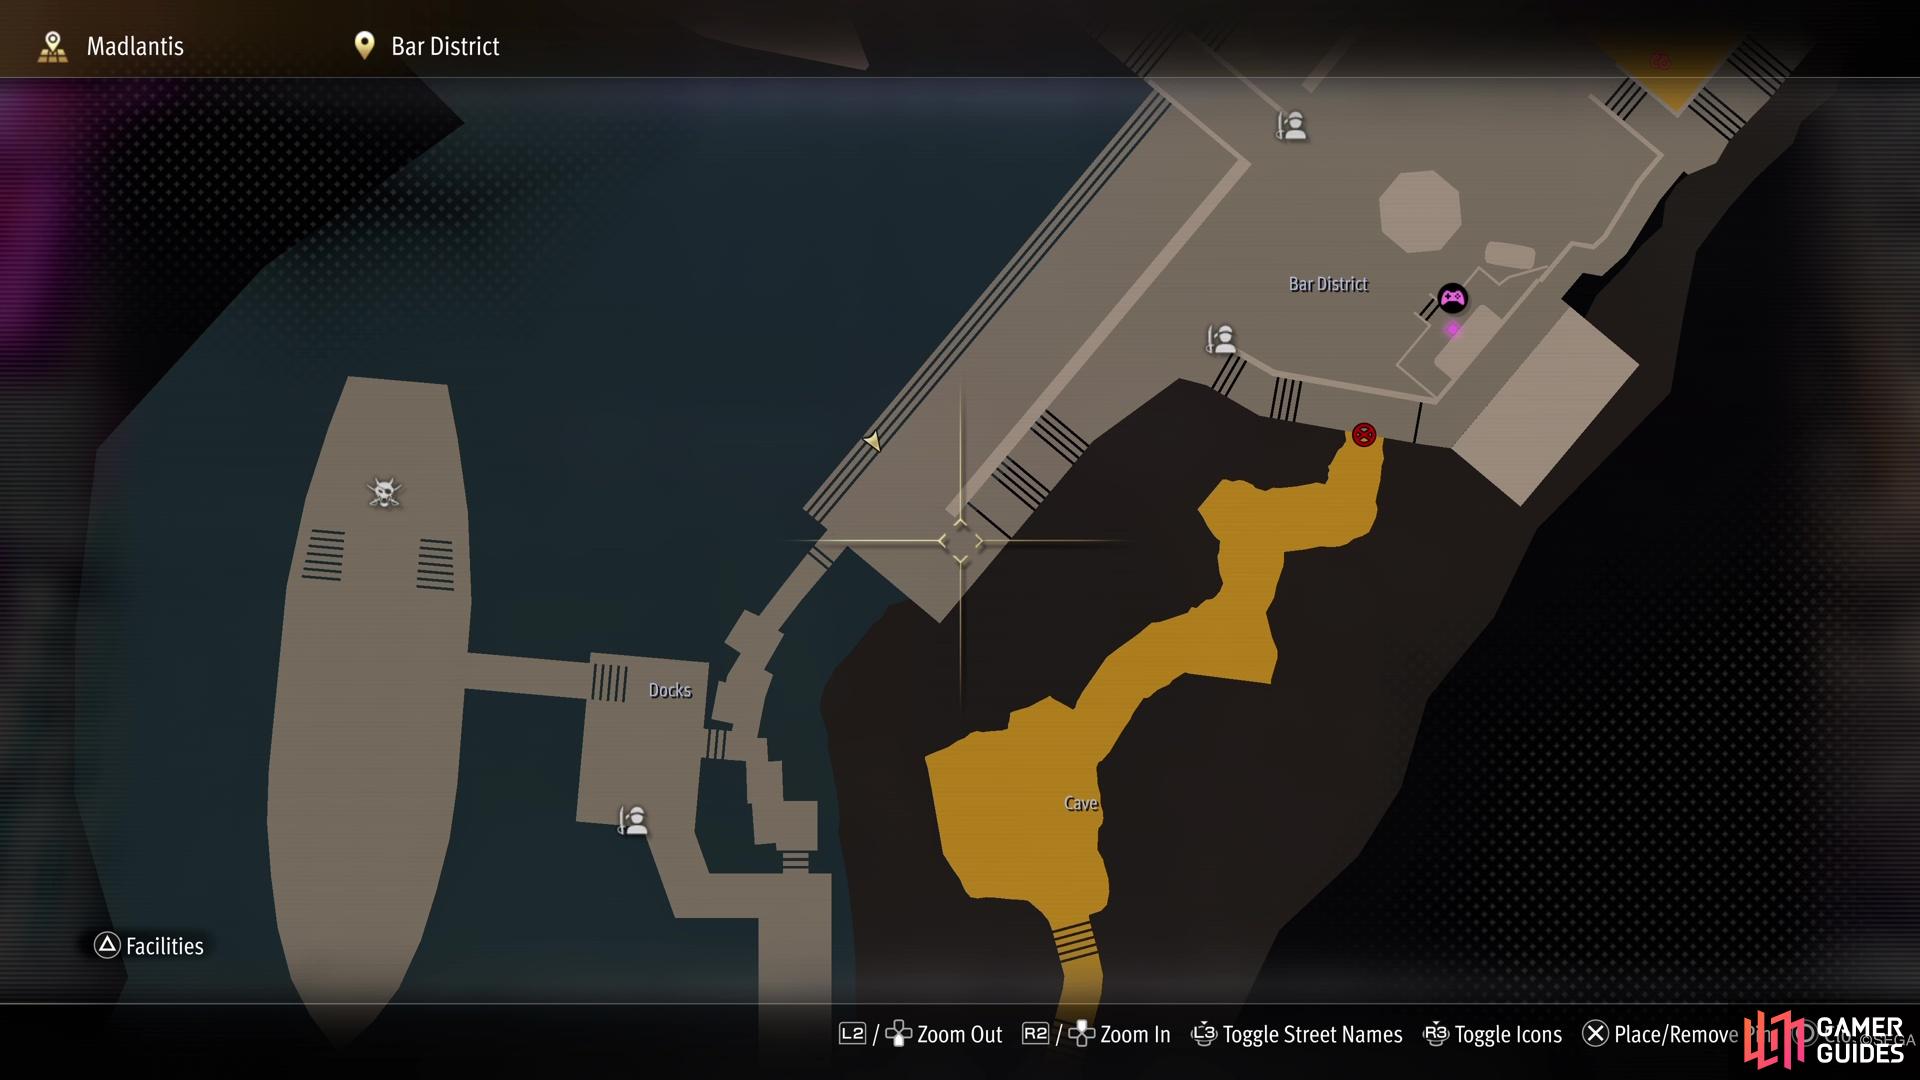
Not far past the Bar District, you can take a breather here.
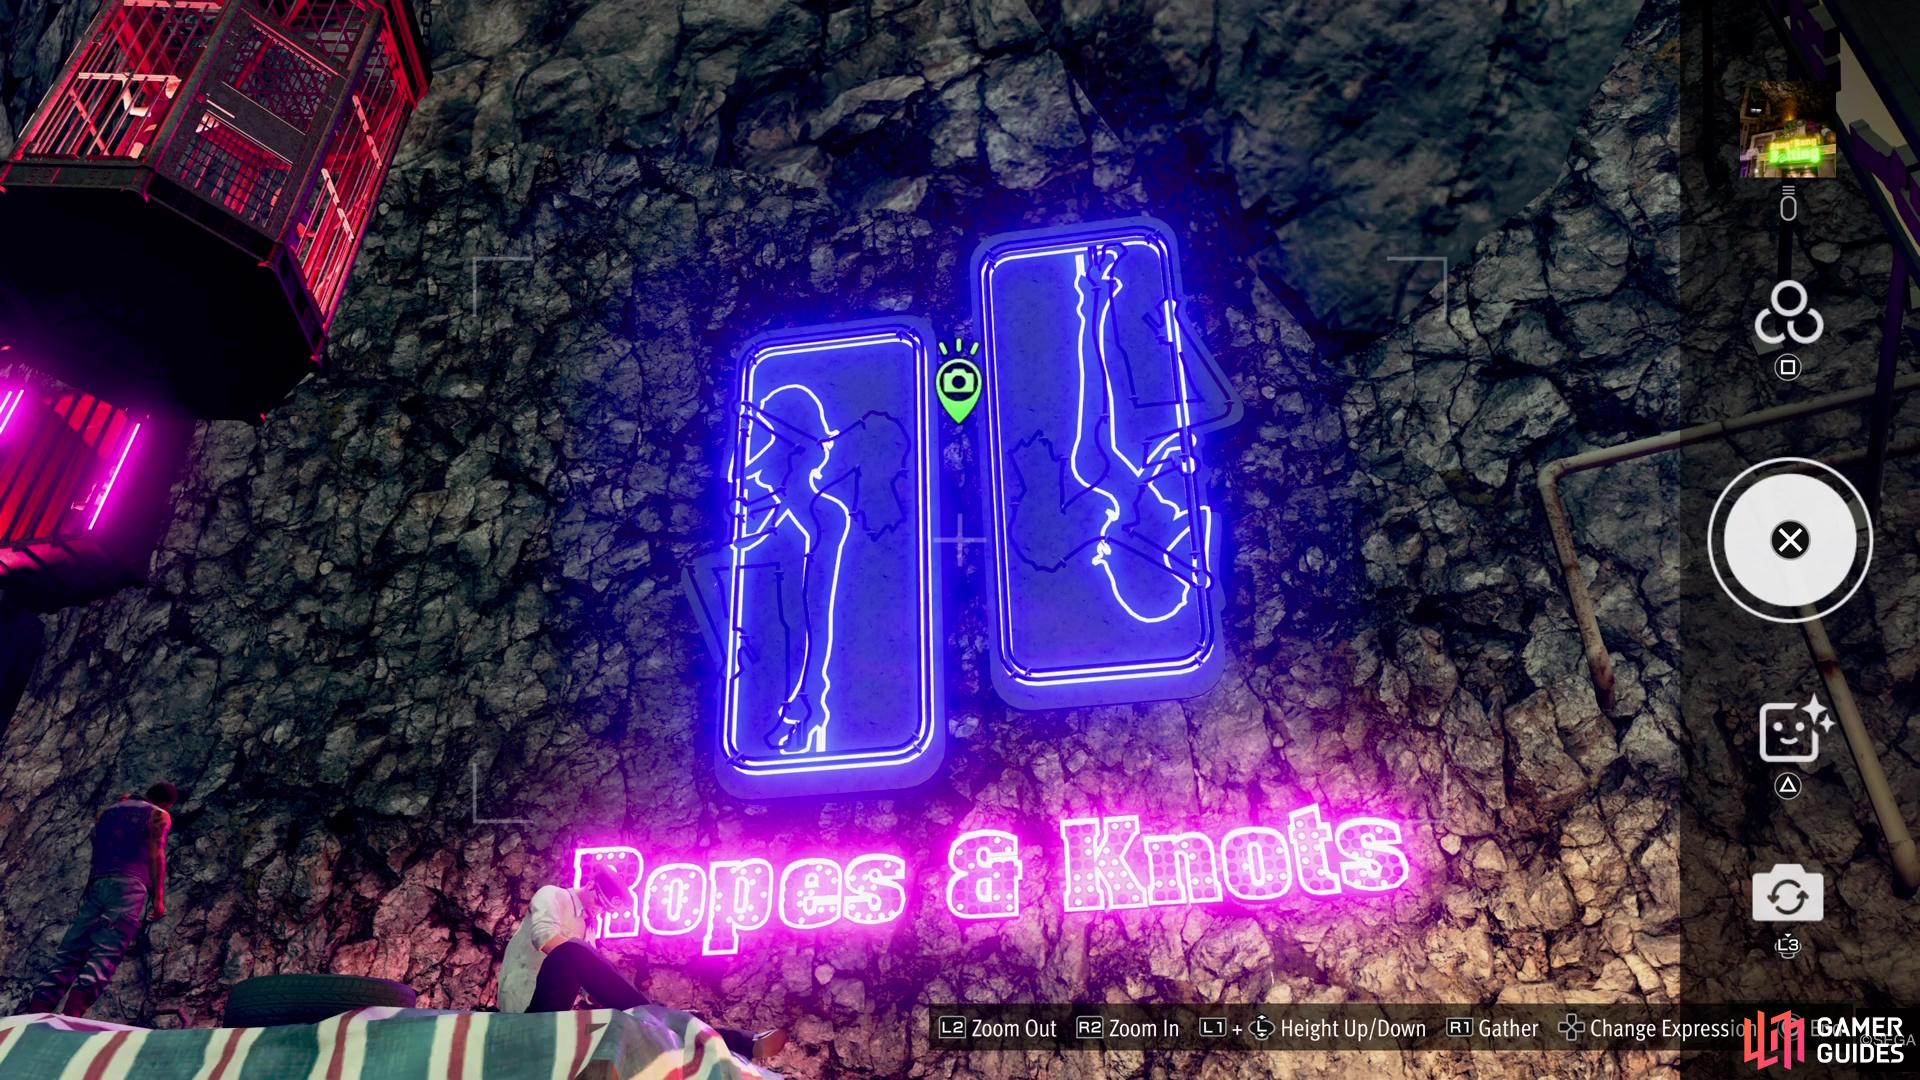
Look at the eastern wall of the area to see this neon sign.
Madlantis Photo Rally Location #9
Over at the Coliseum Grounds, you will find the counter where you can sign up for the Pirates’ Coliseum. Ignoring the counter, step away from it a little bit and look up to spot the sign for the place. Take a picture of the sign for the Pirates’ Coliseum.

At the Coliseum Grounds, go to the counter where you register for the coliseum.
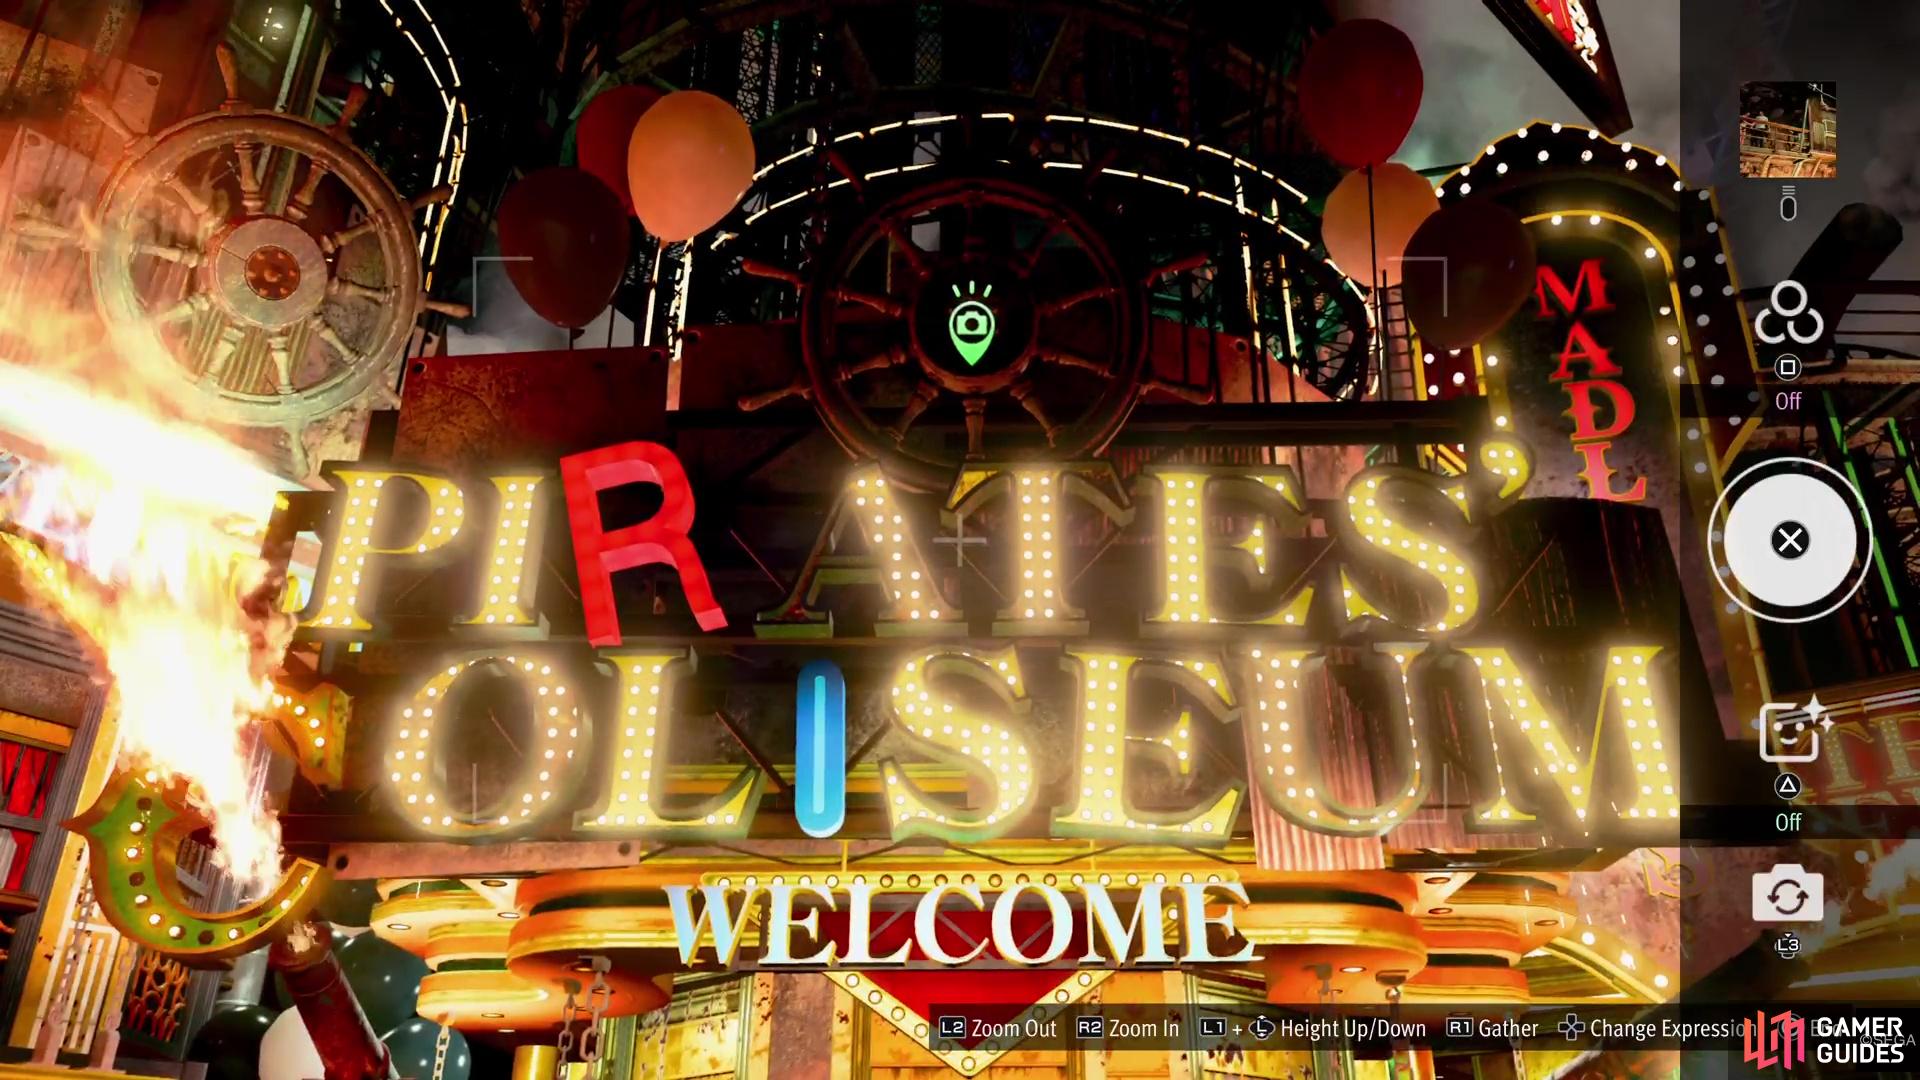
Look up at the sign above the counter and snap a photo of it.
Madlantis Photo Rally Location #10
The next entry is also at the Coliseum Grounds and pretty much right next to the counter for the Pirates’ Coliseum. In fact, simply walk up to the counter, then look to the right of it. On that counter should be the little toy statue of Kametaro, so snap a picture of it.
This one will still be at the Pirates’ Coliseum counter.
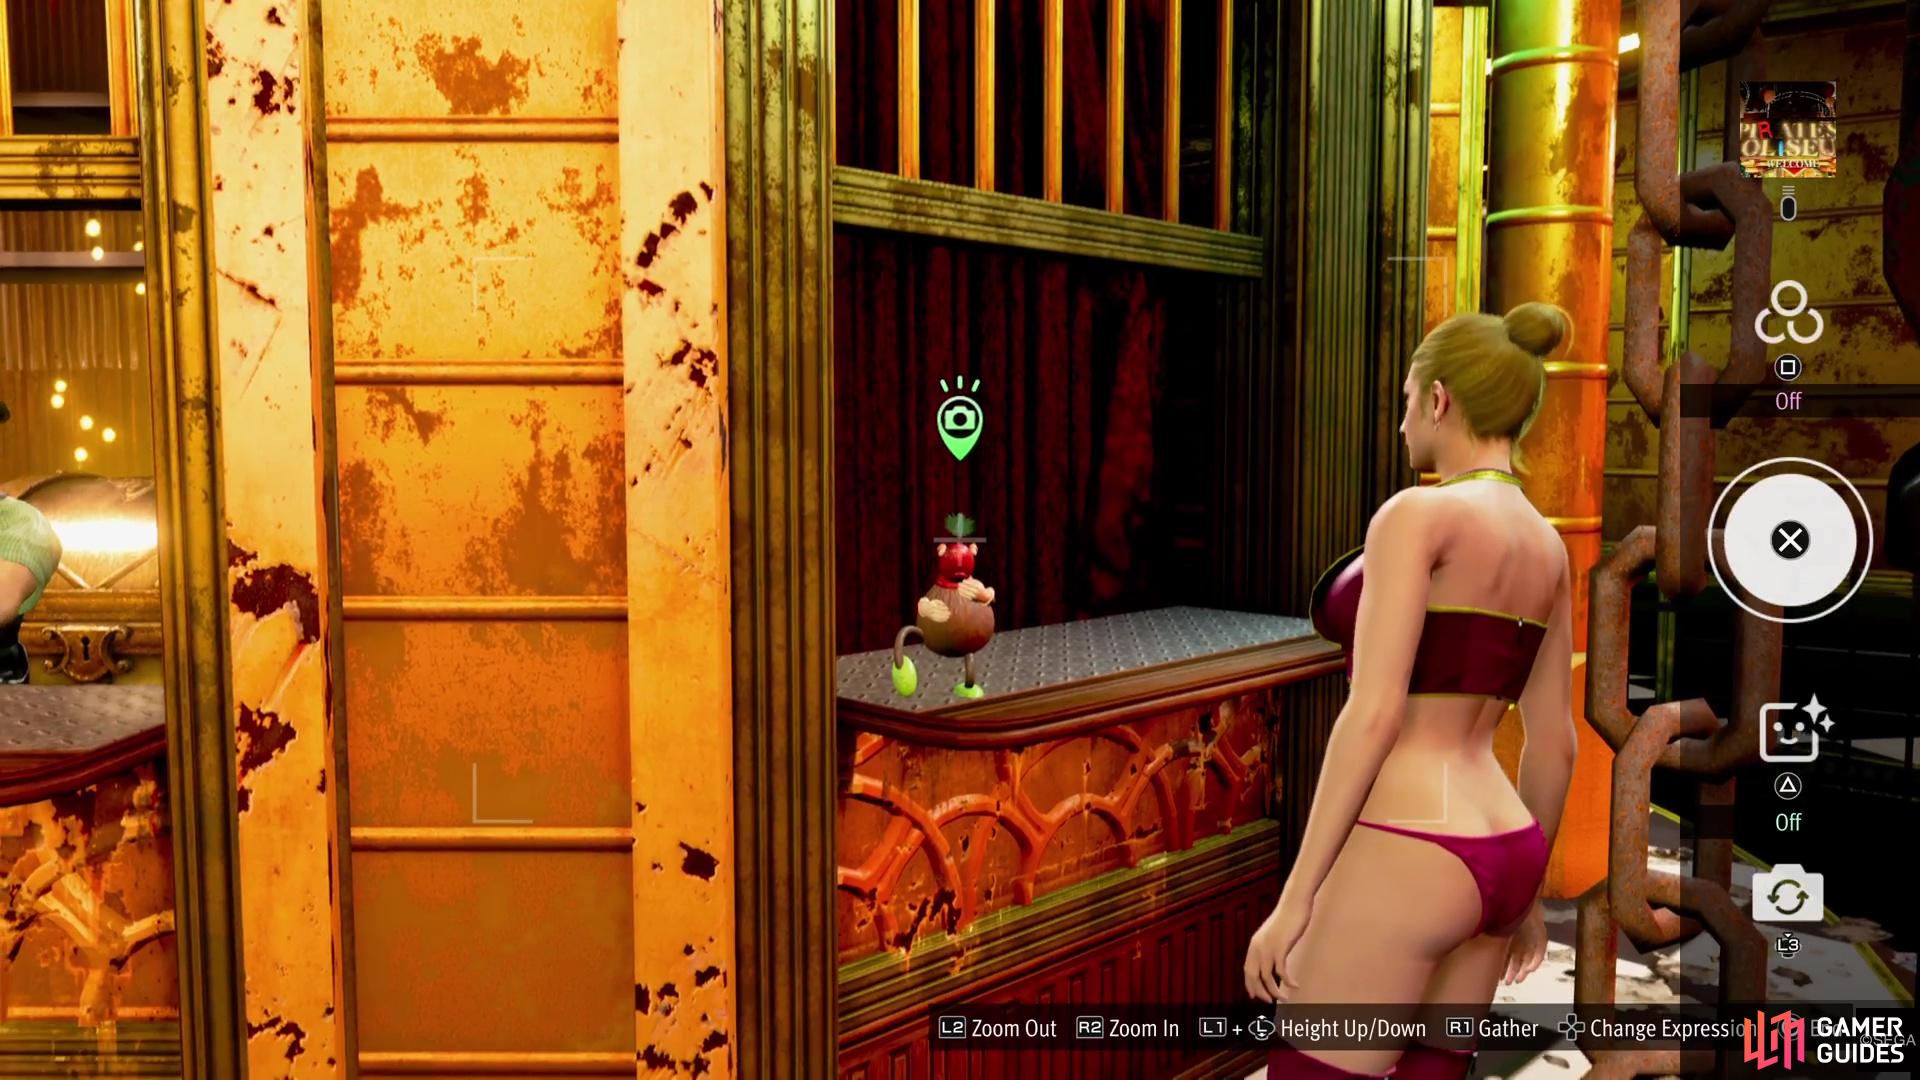
To the right of the registration NPC, you can spy a little Kametaro statue.
Madlantis Photo Rally Location #11
In the Gaming Hall, you will find some UFO machines, as well as the Golf minigame. To the north of those is a small area that doesn’t really have anything of value, other than the boat fast travel. Stand on the northern end of this small area and look up to see a sign that says “Madlantis Circus.” That’s what you want to get a picture of for this entry.
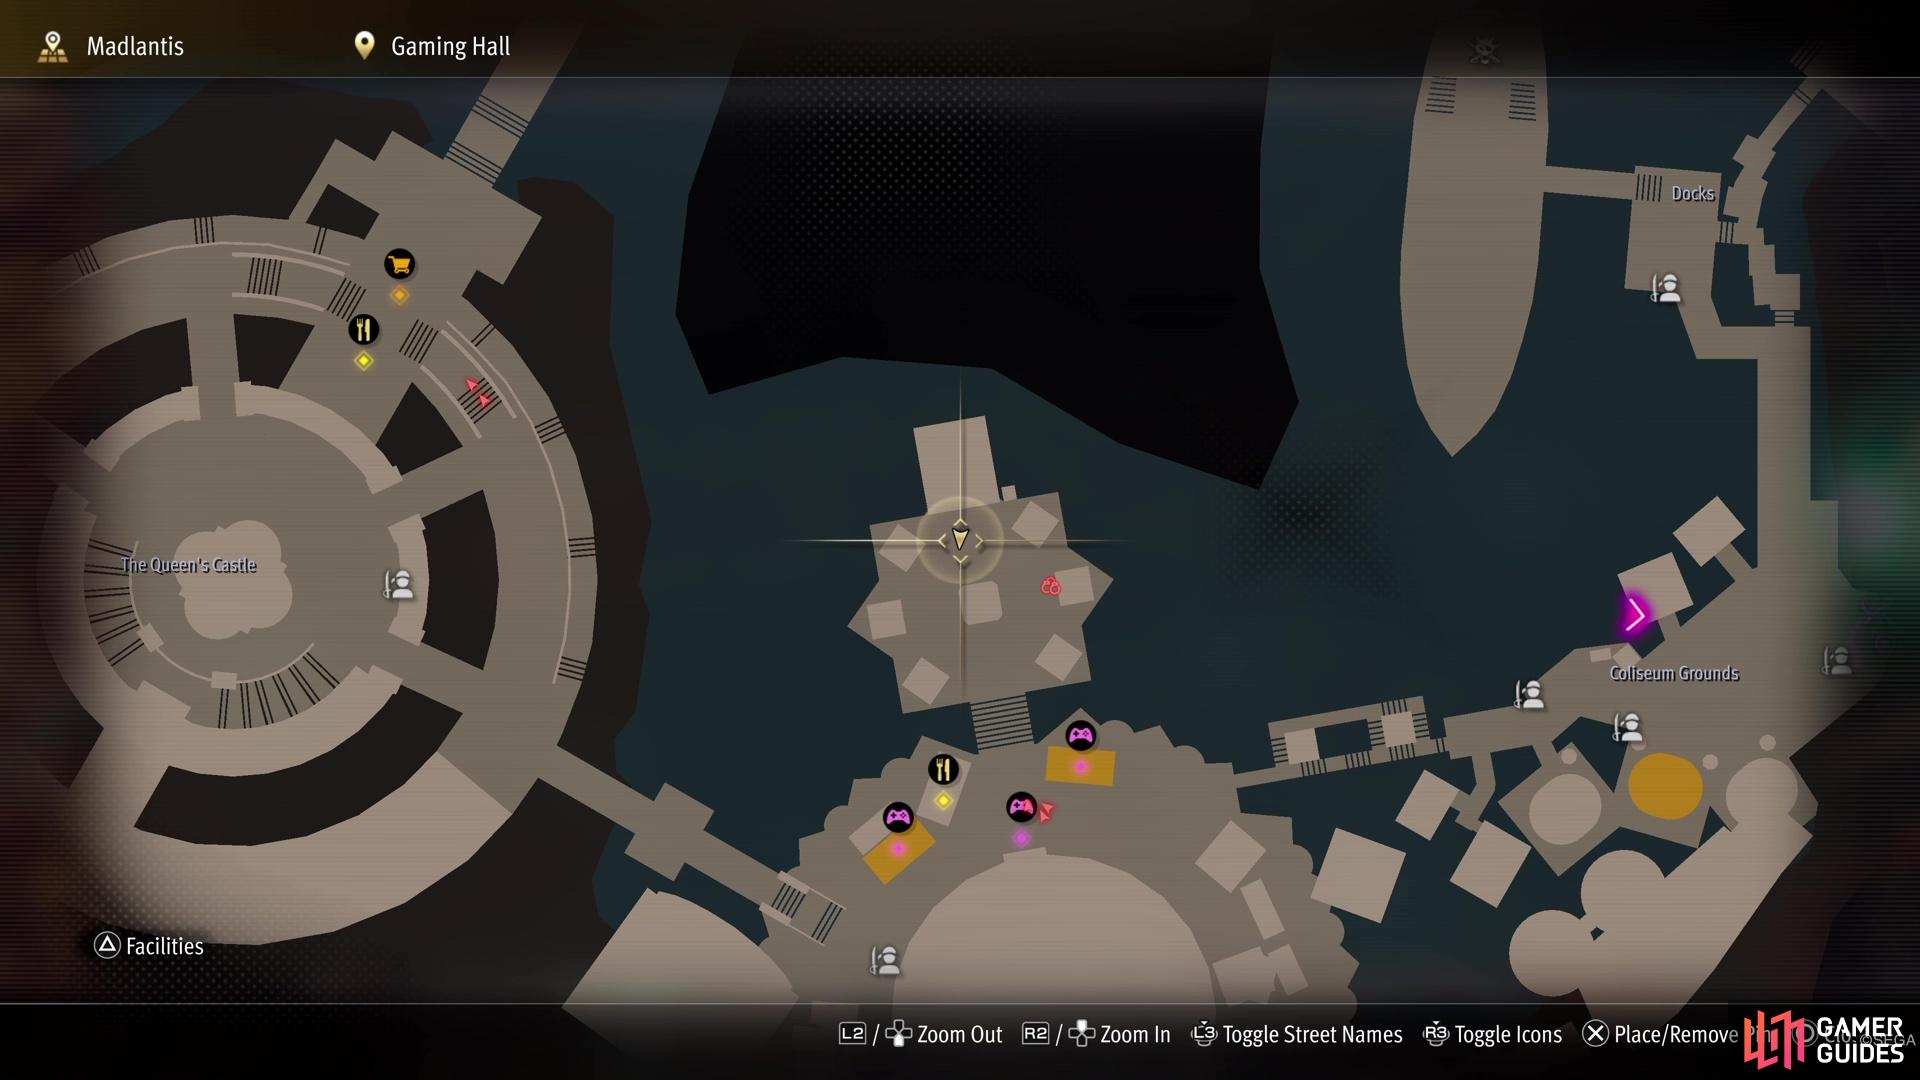
Head over to the Gaming Hall area and to this little spot on the north.
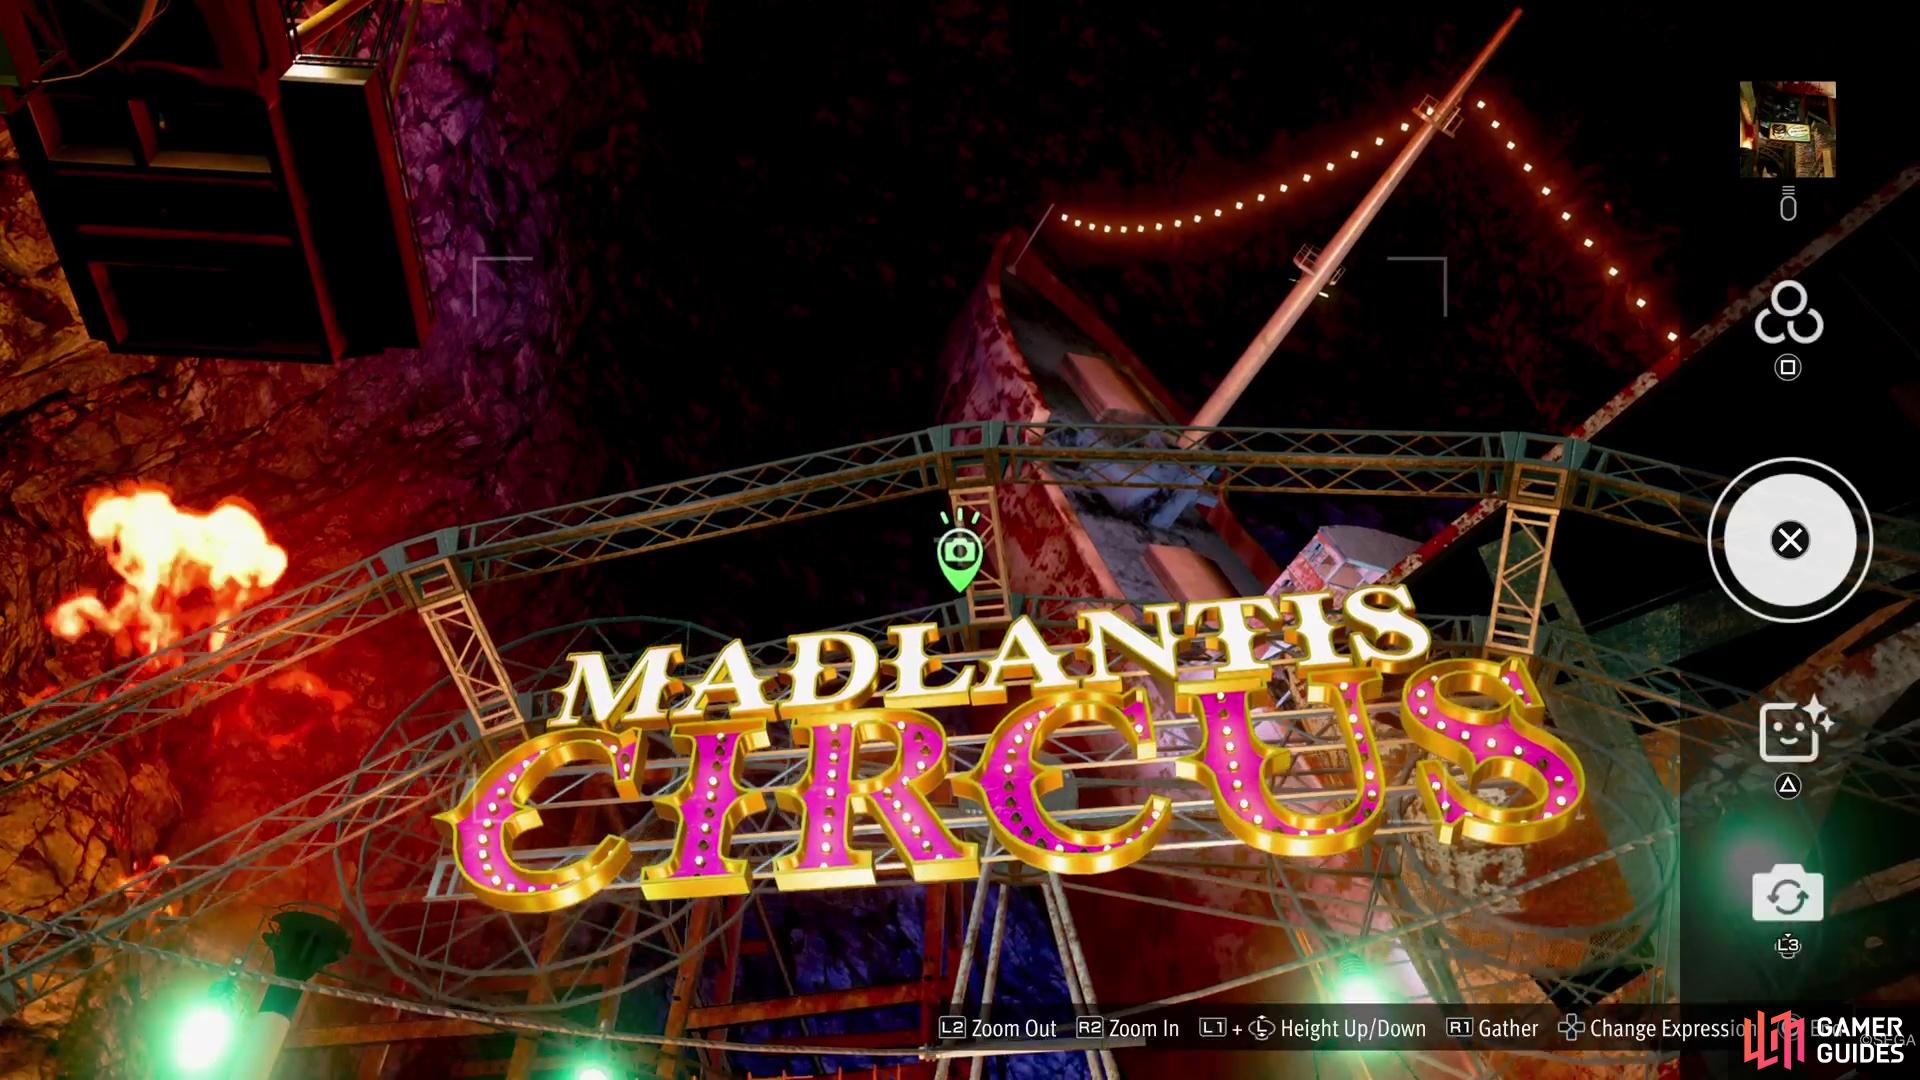
Look up and snap a photo of the Madlantis Circus sign.
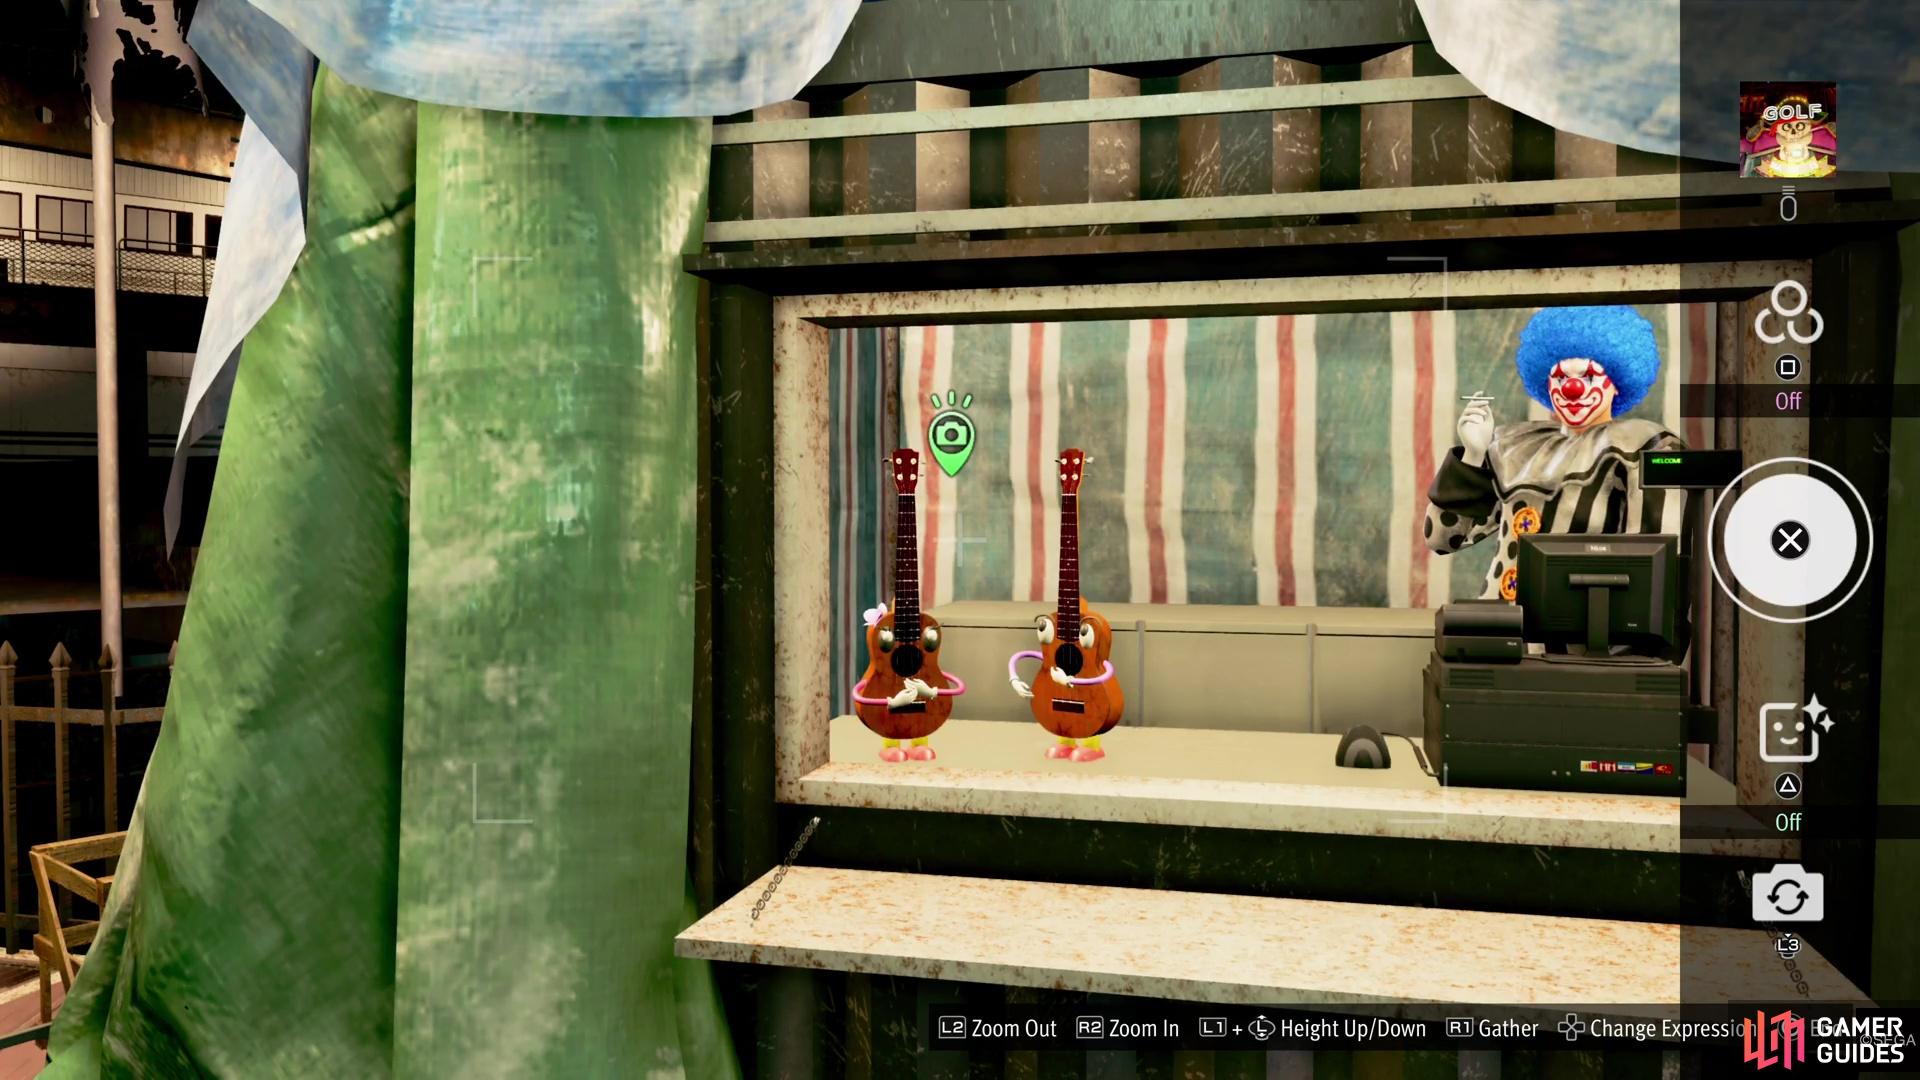
Madlantis Photo Rally Location #12
While still in the Gaming Hall, head on over to the Golf minigame and stand in front of the NPC there. Once you do, look at the sign above him and take its picture.
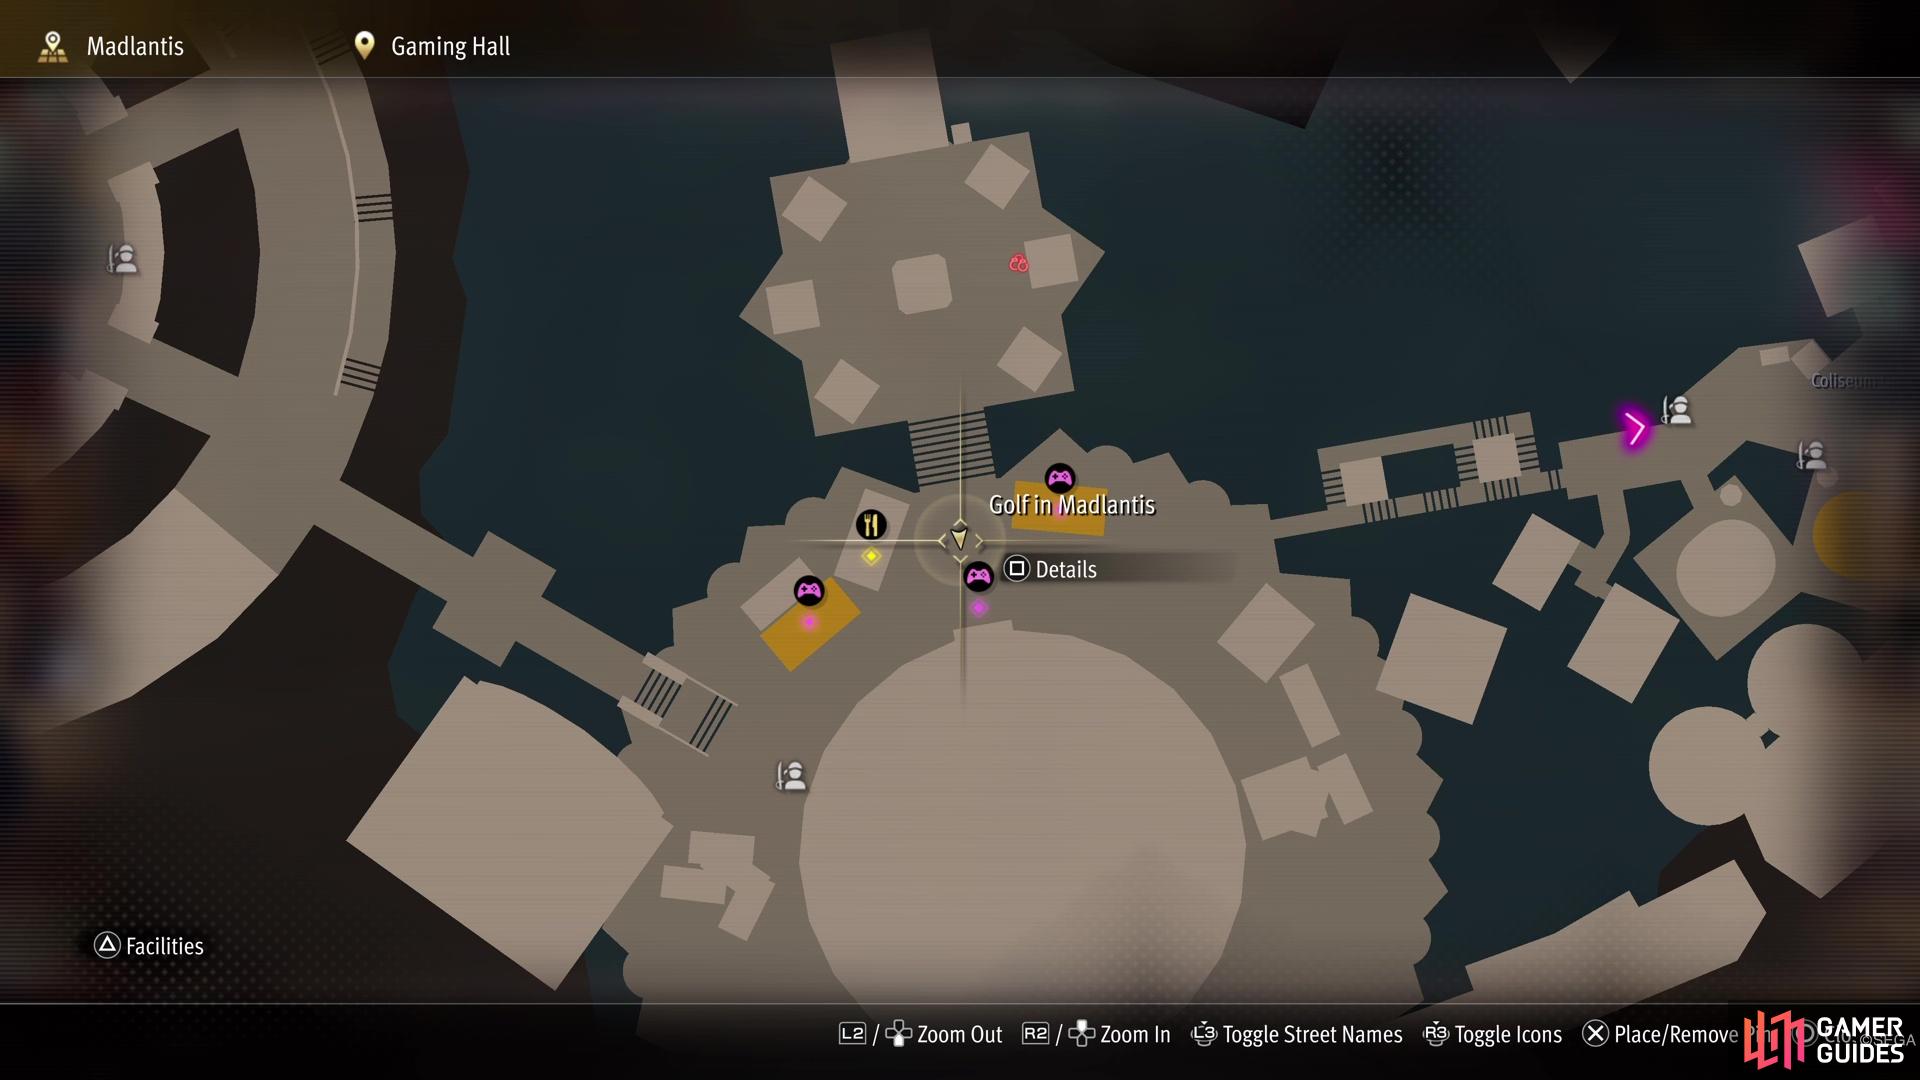
This one is still in the Gaming Hall area, but right next to the golfing minigame.
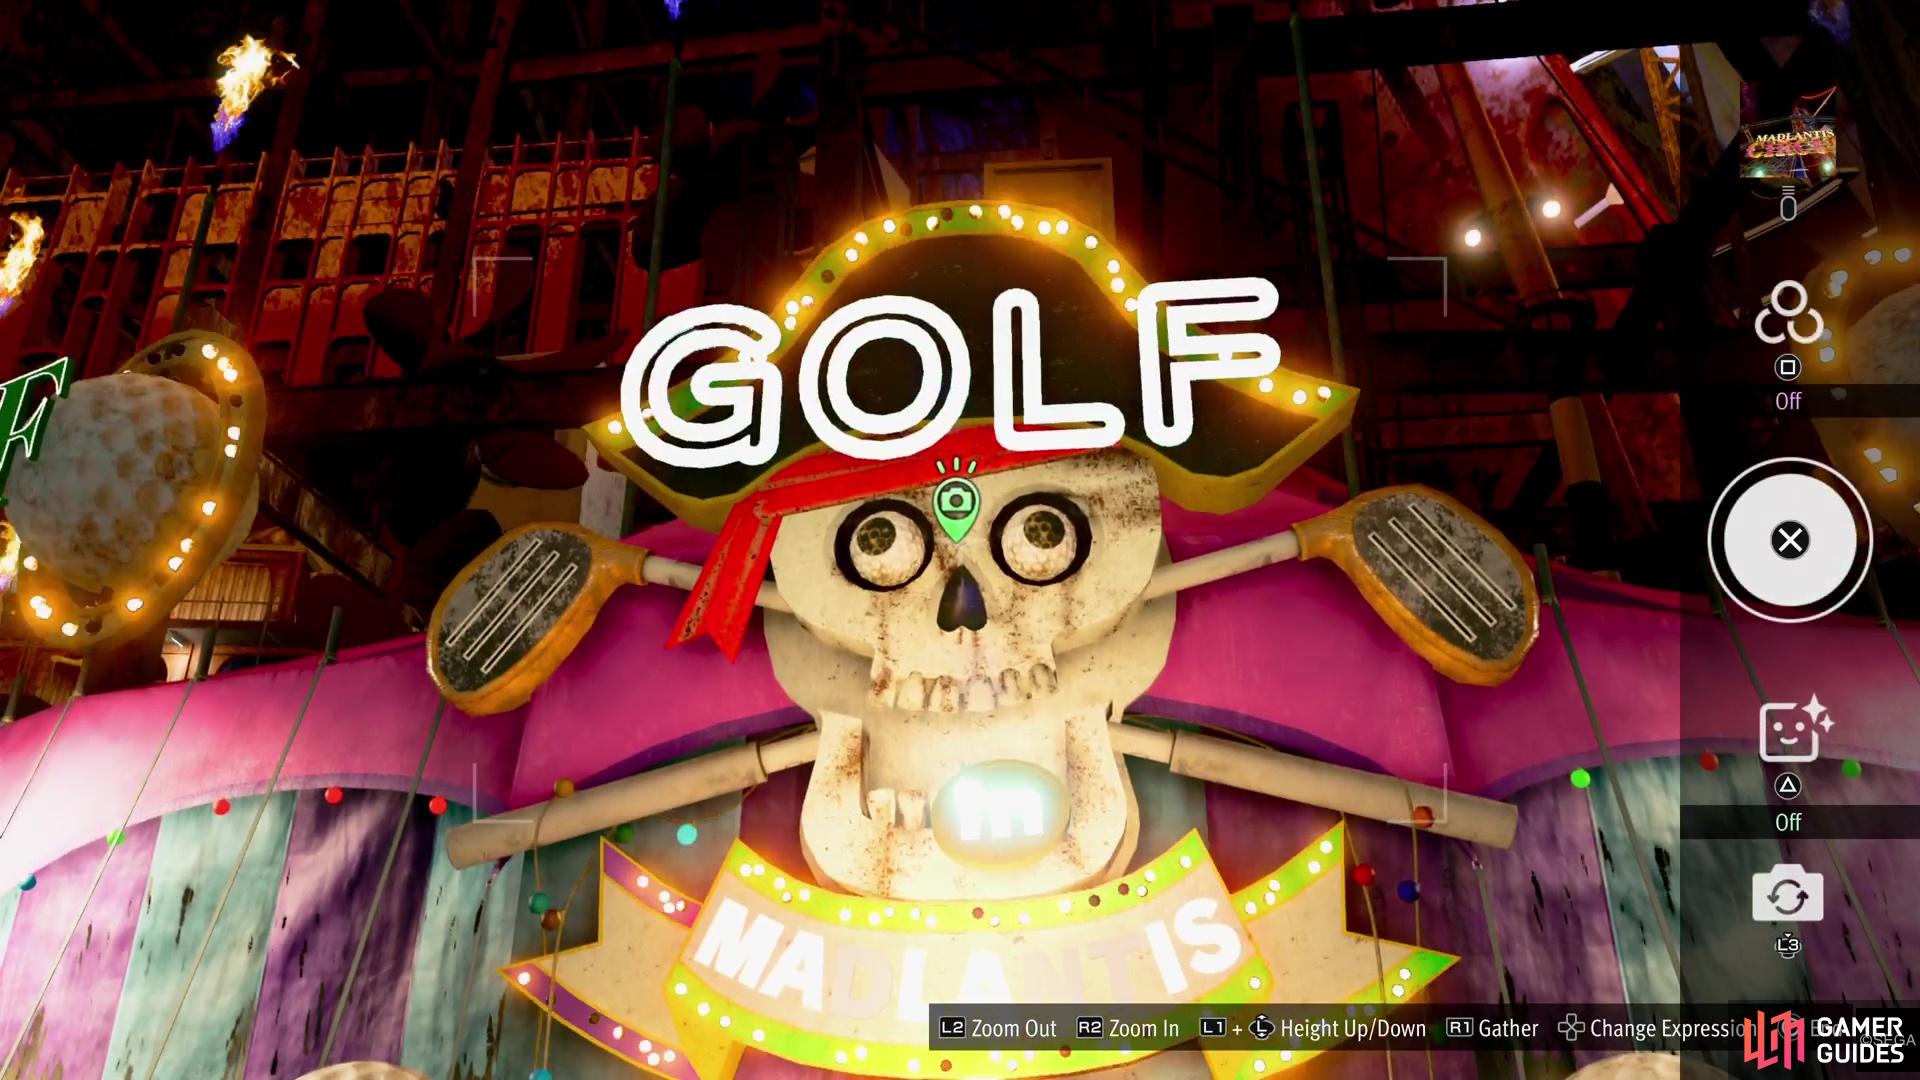
The “Golf” sign above where you do the minigame is what you want.
Madlantis Photo Rally Location #13
This picture is also in the Gaming Hall, but you might be a little lost in finding it. You won’t find it by the golf minigame and UFO machines, but you might want to check the northern area. There are three tents on either side there and the middle one on the left side will have some musical instruments on the counter. Take a picture of those instruments.
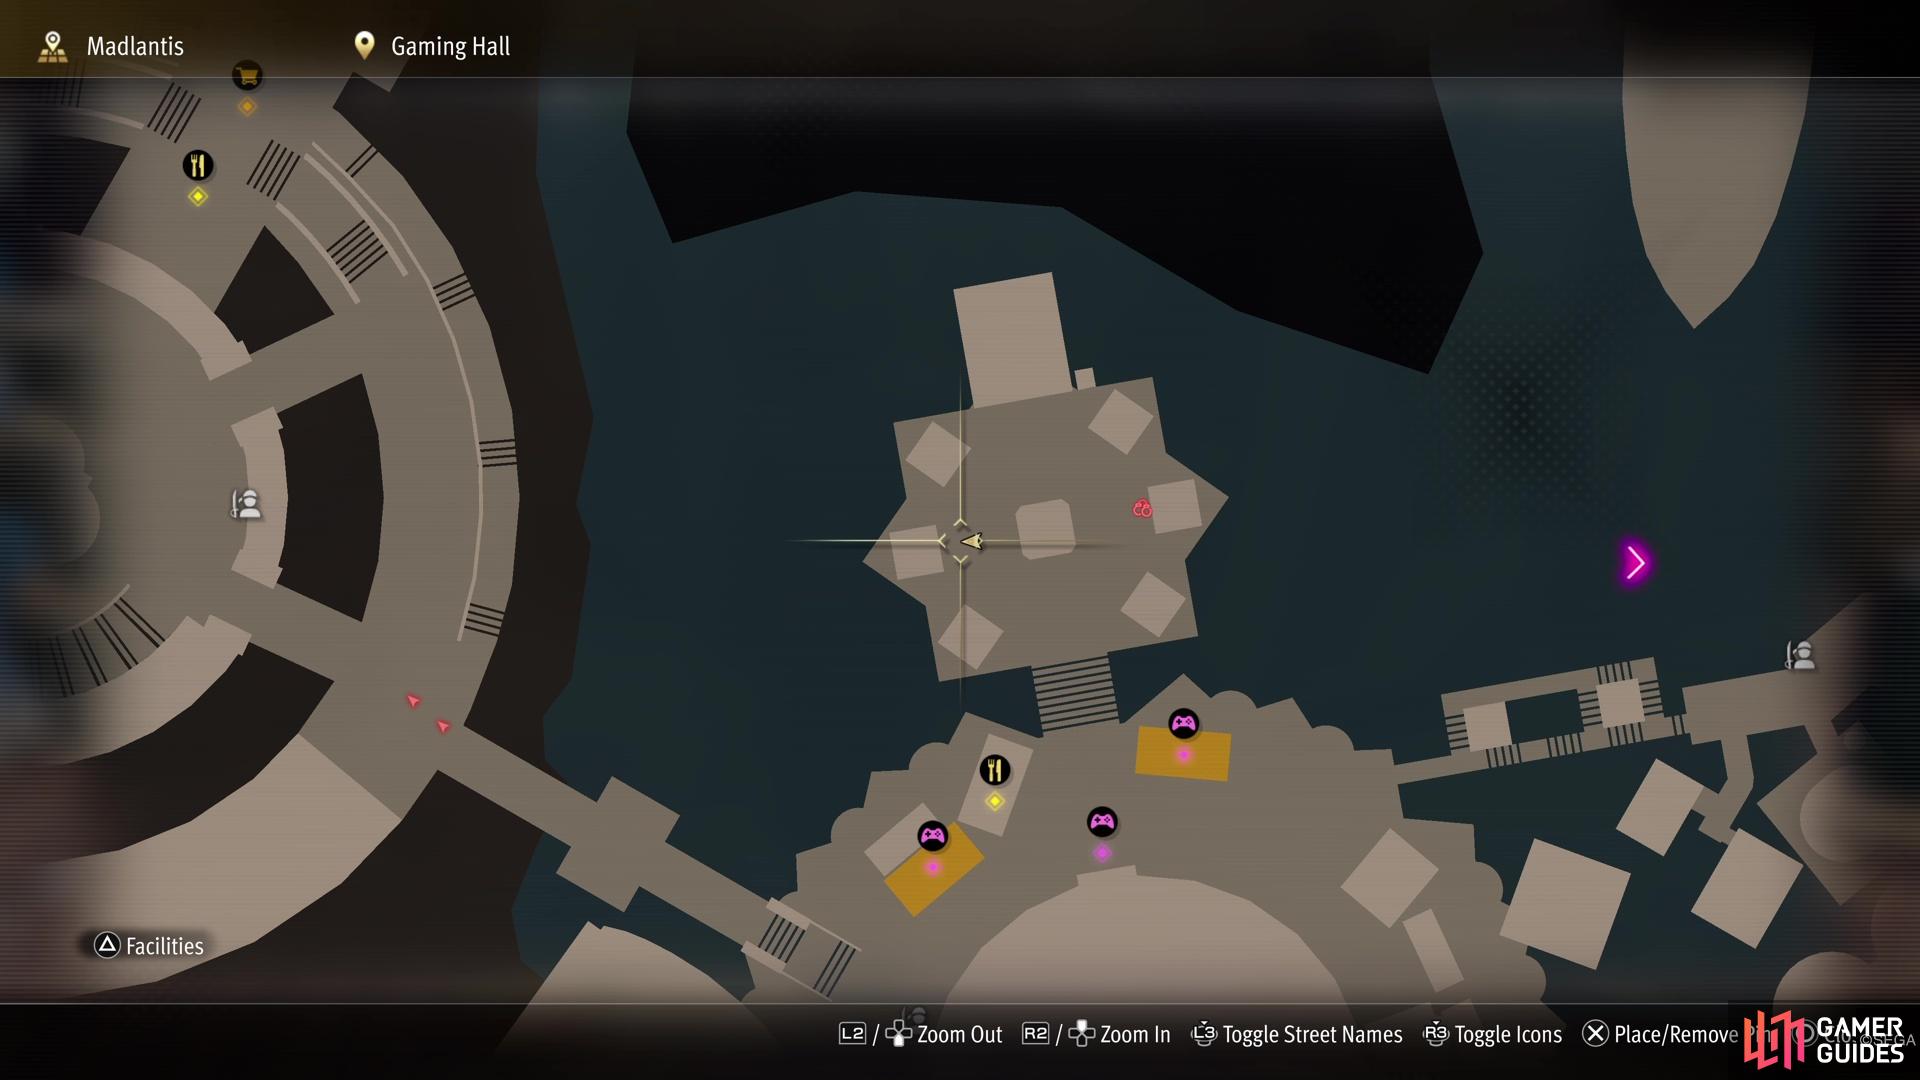
Still in the Gaming Hall, check this tent over by the northern section.
There is a booth with some instruments that you need to photograph.
Madlantis Photo Rally Location #14
At the Queen’s Castle area, which is the big round section just past the Gaming Hall, there are some stairs on the side leading down. Take these stairs and keep following them, past the shop and up another set. If you look at the map, you should be on the northern side of the area. While here, look up to spot a sign that says “Cache for Cash” that has a masked man on it. Take a picture of that sign.
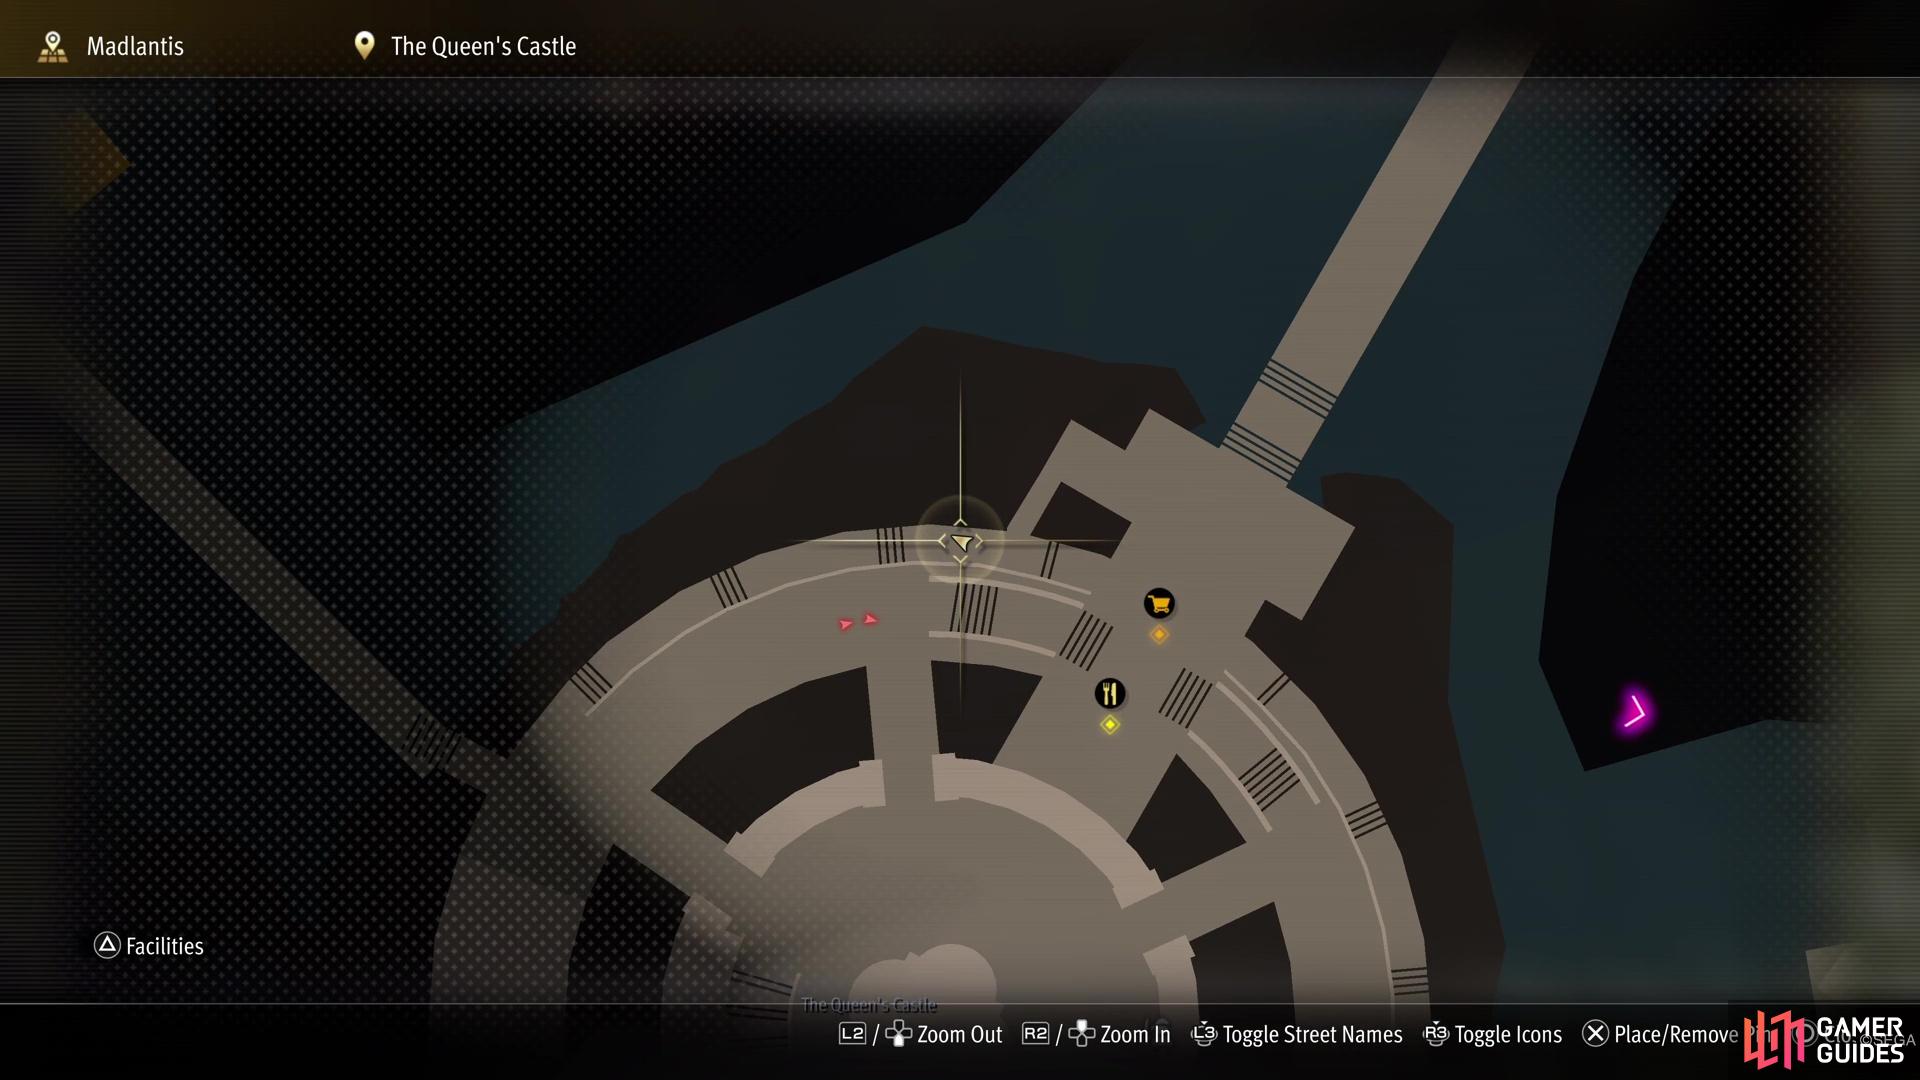
In the Queen’s Castle area, go down the stairs and to this spot in the north.
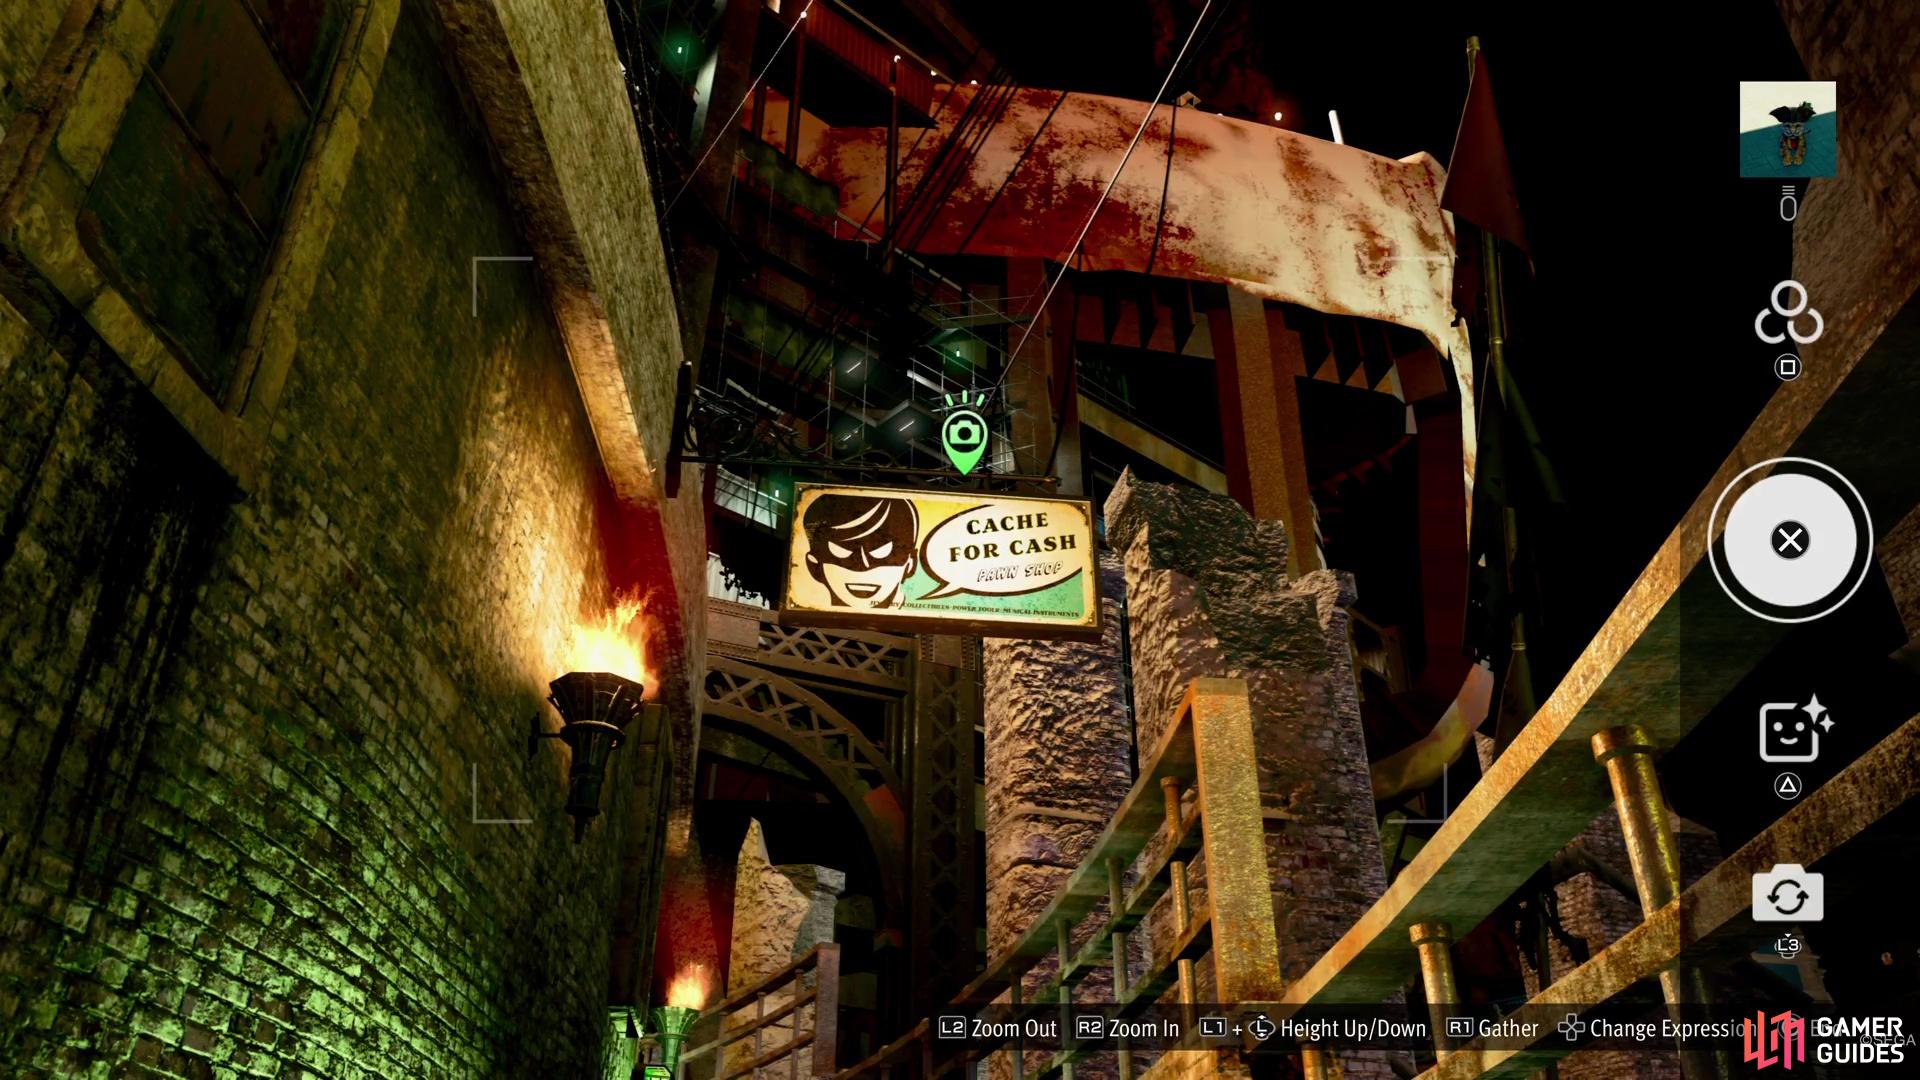
There is a pawn shop sign that needs photographed there.
Madlantis Photo Rally Location #15
The final photo in this set is one that will take a little work to unlock. First and foremost, progress the main story until you unlock the Pirates’ Coliseum. Once you have, do the Tournament of Novices, then the Tournament of Captains (one star). These aren’t too hard and you should be able to squeak by with a good crew, with maybe one extra boarding squad. Whenever you’ve done the above, it will unlock the Luxury Palace Hotel at the far western end (game doesn’t mention this until much later). Go inside there, turn to the left and take a photo of the one golden statue on the stairs.
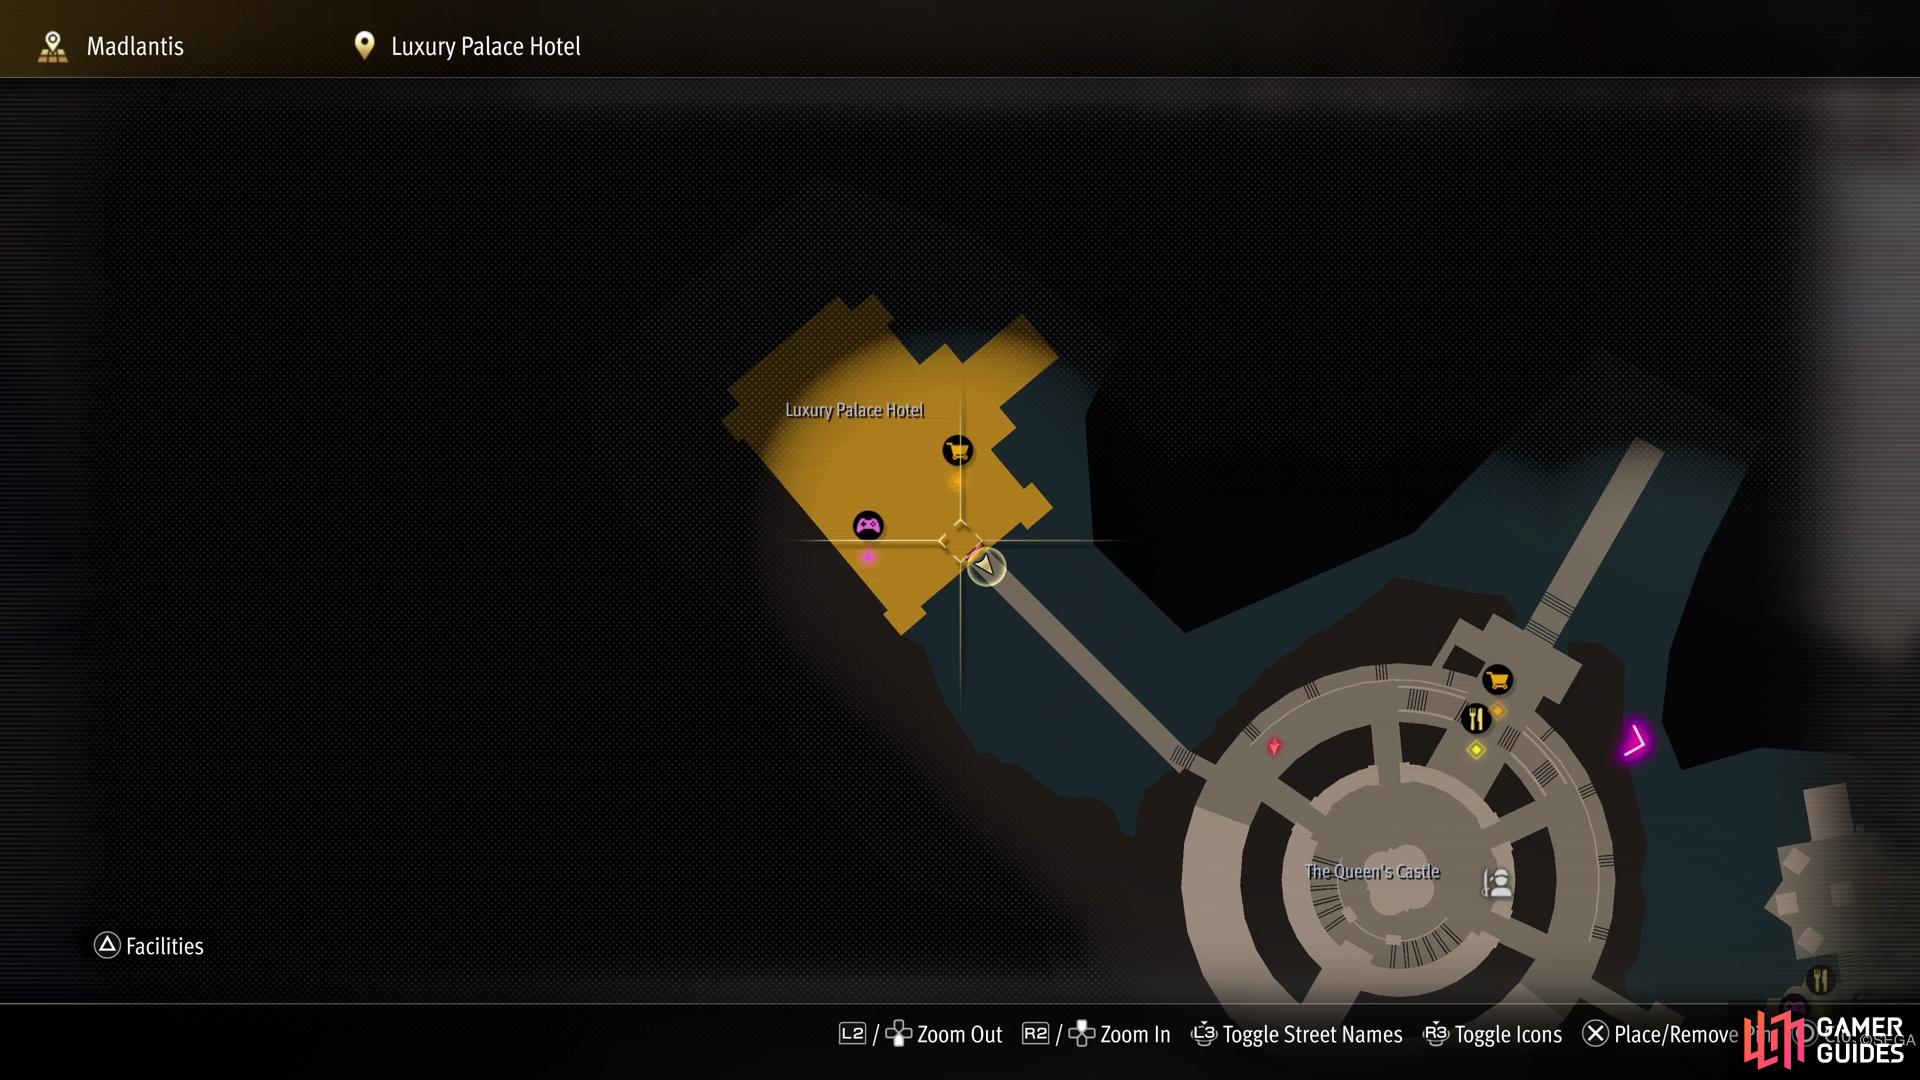
Once you progress enough in the coliseum, you’ll open up the Luxury Palace Hotel.
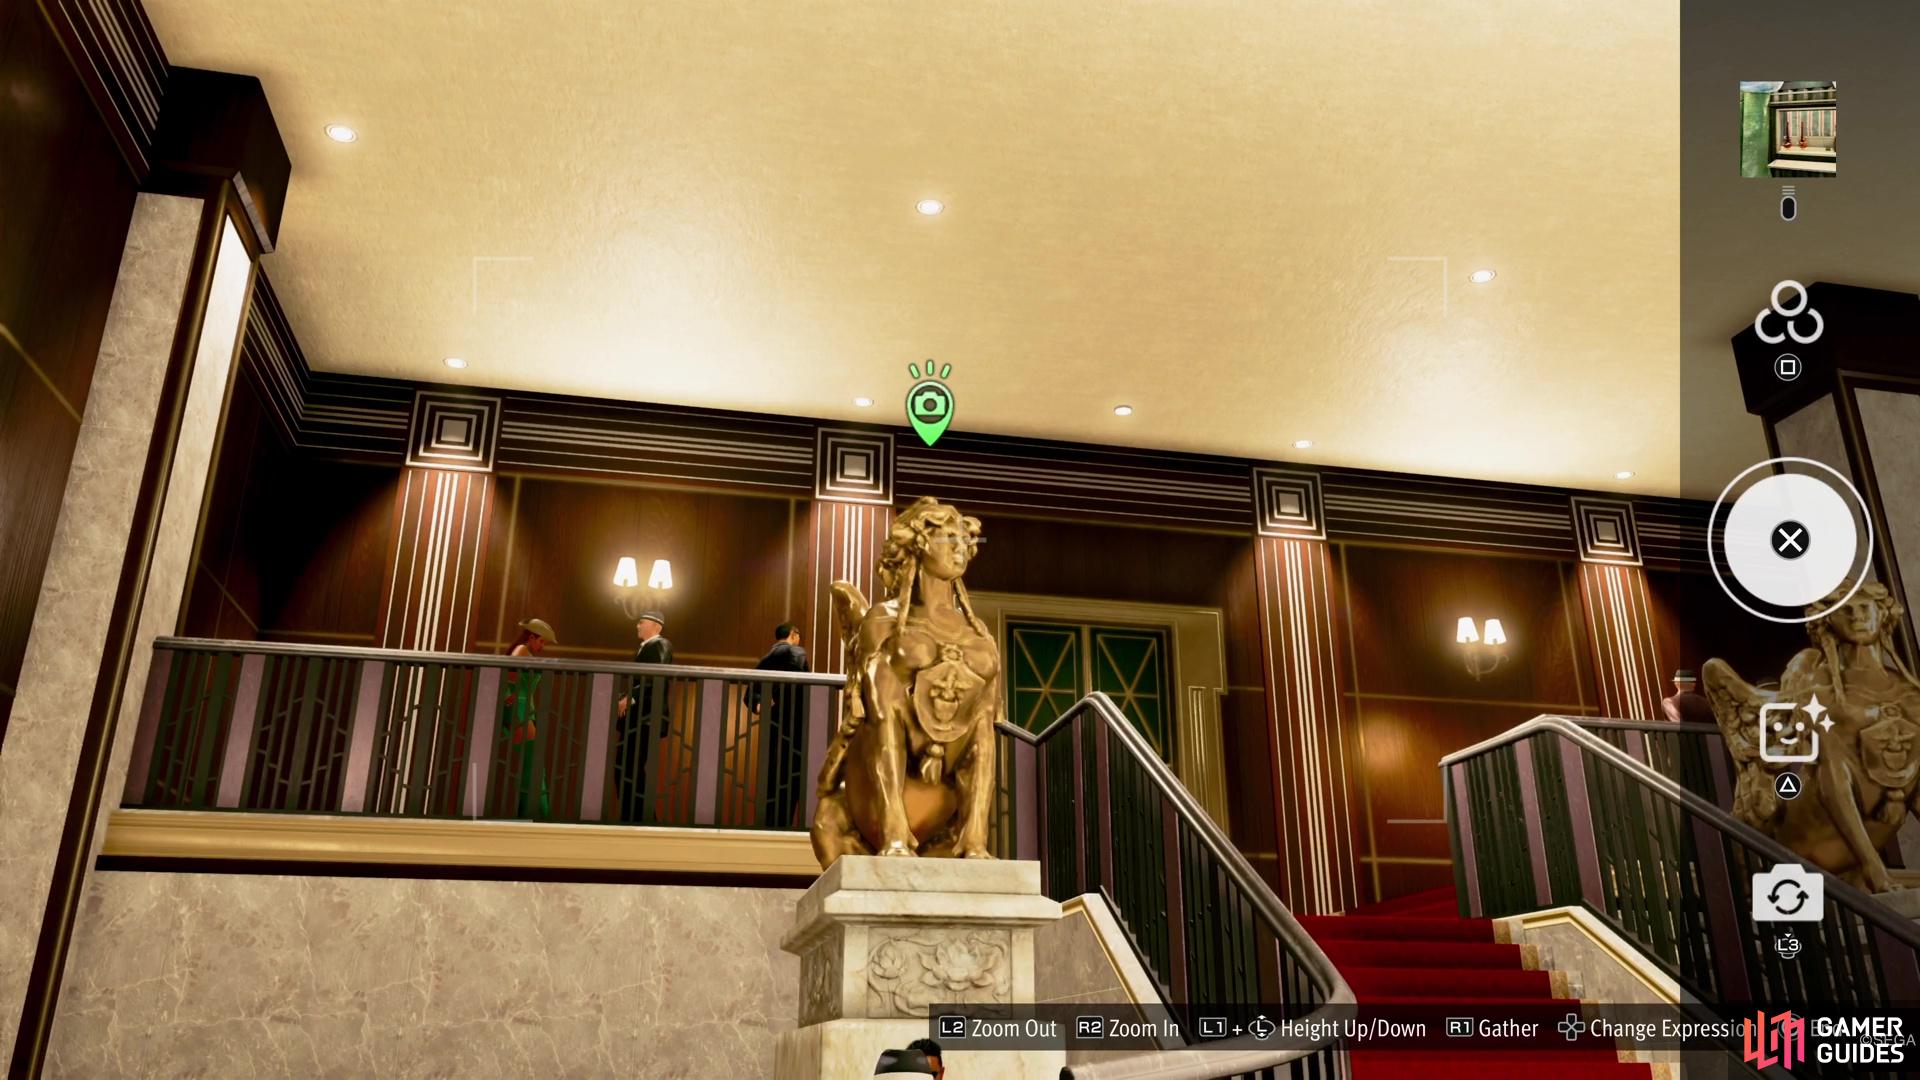
Go inside and snap a photo of the one statue by the stairs.
Remember that after you snap a picture of all 15 things above, you will have to return to the Alo-Happy store in Honolulu. Speak to the one NPC there to show off your stamps and you’ll receive your prize, which is the Zombie costume set for Majima.
No Comments