Updated Title Publisher
Updated Title
Published Title Score Editor's Choice Publisher
Published Title Publisher
1,505 Items

Description

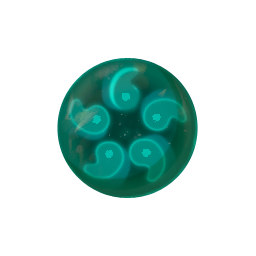
The remnants of a former Sage’s resolve. If you gather four of them and offer them to a "Goddess Statue" iconGoddess Statue, you can deepen your connection with the Sages.

In-game Description

A small stone believed to have belonged to a sage. Holding it in your hand, you can feel the remnants of a strong bond.

20 Interactive Map Locations

1

Sage's Will

Hyrule Sky Islands Map
X: 12561 Y: 11657

On the "Luminous Stone" iconLuminous Stone island.

View on map
Marker screenshot
2

Sage's Will

Hyrule Sky Islands Map
X: 12341 Y: 7205
View on map
Marker screenshot
3

Sage's Will

Hyrule Sky Islands Map
X: 14514 Y: 9410

Inside chest attached to "Flux Construct II" iconFlux Construct II.

View on map
Marker screenshot
4

Sage's Will

Hyrule Sky Islands Map
X: 12351 Y: 8920

Chest on the middle level of this island.

You can glide down from the top, along the south face. Or "Ascend" iconAscend from the lower level.

View on map
Marker screenshot
5

Sage's Will

Hyrule Sky Islands Map
X: 8719 Y: 12542

Inside the chest. You need to raise th e hatch adn let the water out for a long enough period for you to safely grab this.

View on map
Marker screenshot
6

Sage's Will

Hyrule Sky Islands Map
X: 4023 Y: 7336

Inside chest guarded by "King Gleeok" iconKing Gleeok.

View on map
Marker screenshot
7

Sage's Will

Hyrule Sky Islands Map
X: 13455 Y: 15017

Inside chest attached to "Flux Construct III" iconFlux Construct III.

View on map
Marker screenshot
8

Sage's Will

Hyrule Sky Islands Map
X: 16188 Y: 15334

Inside chest guarded by "King Gleeok" iconKing Gleeok.

View on map
Marker screenshot
9

Sage's Will

Hyrule Sky Islands Map
X: 5883 Y: 7367
View on map
Marker screenshot
10

Sage's Will

Hyrule Sky Islands Map
X: 4944 Y: 8133

Use the nearby Wing, Fan and/or Rockets to reach this chest.

View on map
Marker screenshot
11

Sage's Will

Hyrule Sky Islands Map
X: 7368 Y: 12657

Inside chest on the lower level of the island.

Use Mirrors to shine light onto the panel above the gate.

There’s a Stake nearby you can use to affix the angle.

View on map
Marker screenshot
12

Sage's Will

Hyrule Sky Islands Map
X: 11728 Y: 14513

End of the lower jaw of Dragonhead Island.

View on map
Marker screenshot
13

Sage's Will

Hyrule Sky Islands Map
X: 4053 Y: 13870

Reward for defeating "King Gleeok" iconKing Gleeok.

View on map
Marker screenshot
14

Sage's Will

Hyrule Sky Islands Map
X: 5380 Y: 10575

Inside Starview Island.

Use Mirrors to reflect the light towards the panel in front of the gate with the treasure chest.

View on map
Marker screenshot
15

Sage's Will

Hyrule Sky Islands Map
X: 6954 Y: 10792

From chest glued to the "Flux Construct III" iconFlux Construct III.

View on map
Marker screenshot
16

Sage's Will

Hyrule Sky Islands Map
X: 15061 Y: 8127

From chest inside the lower half of the spherical island where the crystal for The Sokkala Sky Crystal is.

You can use "Ultrahand" iconUltrahand to rotate the spherical apparatus so the entrance is positioned between the two halves of the island.

View on map
Marker screenshot
17

Sage's Will

Hyrule Sky Islands Map
X: 13867 Y: 9543

From chest inside the lower half of the spherical island where the "Jirutagumac Shrine" iconJirutagumac Shrine is.

By default, the entrances to the island rotate automatically.

You can either ride/stay near an entrance until it reaches the lower half.

Or you can detach the Fan and push the lever yourself until an entrance is between the two halves.

View on map
Marker screenshot
18

Sage's Will

Hyrule Sky Islands Map
X: 14016 Y: 10578

From chest glued to the "Flux Construct II" iconFlux Construct II.

View on map
Marker screenshot
19

Sage's Will

Hyrule Sky Islands Map
X: 9498 Y: 13653

Inside chest glued to "Flux Construct III" iconFlux Construct III.

View on map
Marker screenshot
20

Sage's Will

Hyrule Sky Islands Map
X: 11264 Y: 14643

In a chest inside the upper island north-west from Joku-usin Shrine.

You can reach this island by using the piston launcher on the roof of the building with the three "Like Like" iconLike Likes.

Remember to angle the launcher slightly right. You can wait for lightning to strike the apparatus to power the launcher.

Or you can use lightning-based attacks on the apparatus, provided you have enough protection to not get shocked.

Note: Our screenshot is from before the fog has been lifted. We don’t recommend exploring like this.

View on map
Marker screenshot
No Comments
No Upvotes
User profile pic

Comment submission error:

The comment must be at least 1 character in length.

Pencil icon Sign up

Or

Gamer Guides Premium


Find out more

Receive email updates with the latest content - 100% free!

New Maps
New Databases
New Guides and much more…

You can unsubscribe at any time.

GG logo

Register to continue…

Already have an account?

Log in to continue…

Forgot?

Don’t have an account?


Account Created

Select username: